You can configure the time zone automatically or manually on Windows 10 and Windows 11 devices. The setting can be configured from Settings > Time & Language. When you manage the devices through Microsoft Intune, you can leverage device catalog settings to configure the time zone. However, this method may not be suitable for the mobile devices carried by users to different time zones.
Let’s understand how to use the Intune setting catalog to configure the time zone policy for Windows 10 / 11 devices.
Get Windows Time Zone Name
When creating a Windows device configuration profile to configure the time zone, we need to provide a Windows time zone name. Hence, getting the correct time zone name from Windows 10 / 11 is important to avoid any issues. If the time zone name you provided does not match the Windows time zone name then the policy won’t apply and you may see error 65000.
To get a list of all time zones in Windows 10 / 11, open a command prompt and run the below command. You can also find the list of default time zones in Windows in Microsoft documentation here.
tzutil /l
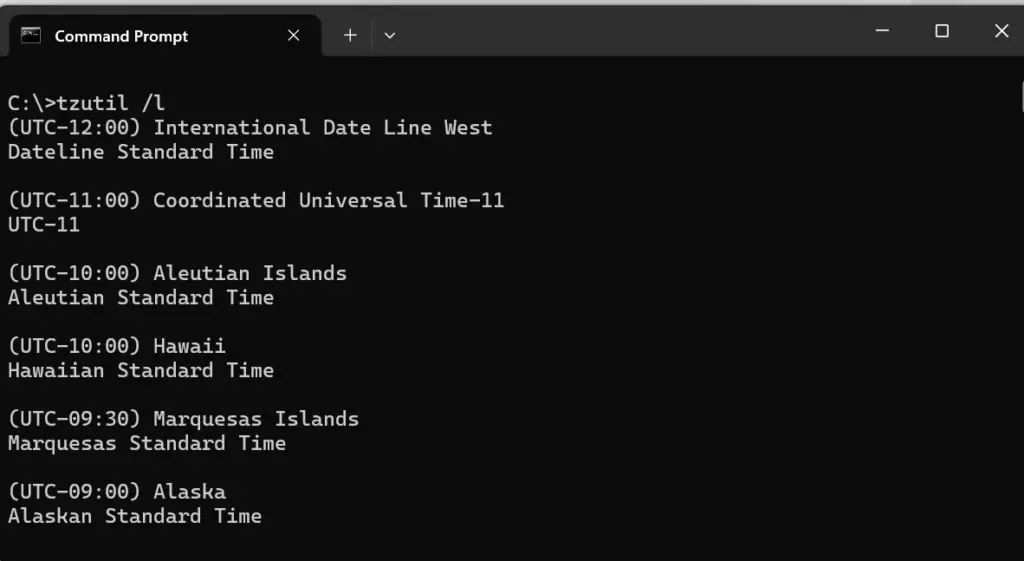
To save the output to a text file, you can use the redirect option.
tzutil /l >timzones.txt
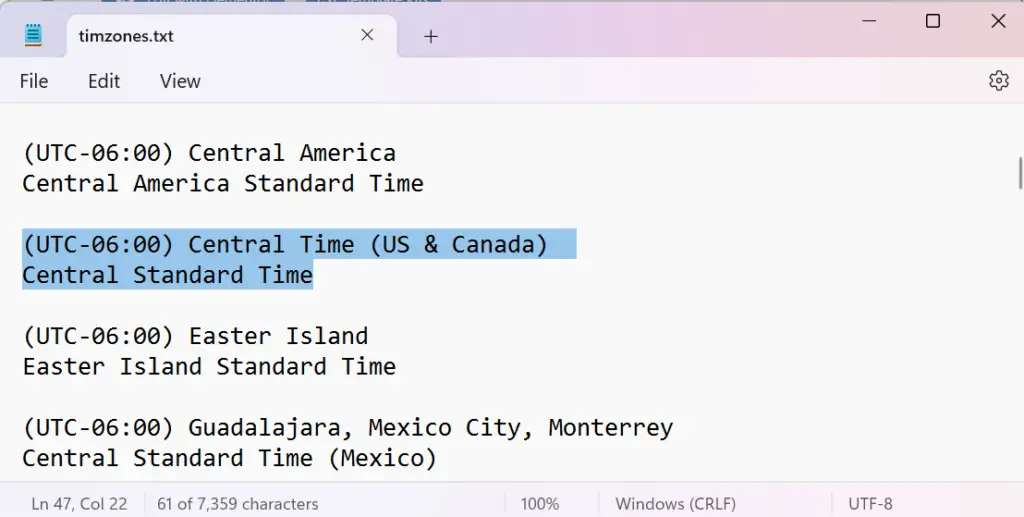
As you can see in the below text file, the time zone name for Central Time (US & Canada) is Central Standard Time. We will use this time zone in our device configuration profile.
Configure Time Zone through Intune Device Configuration Profile
Follow the below steps to set the Windows time zone using the device configuration profile.
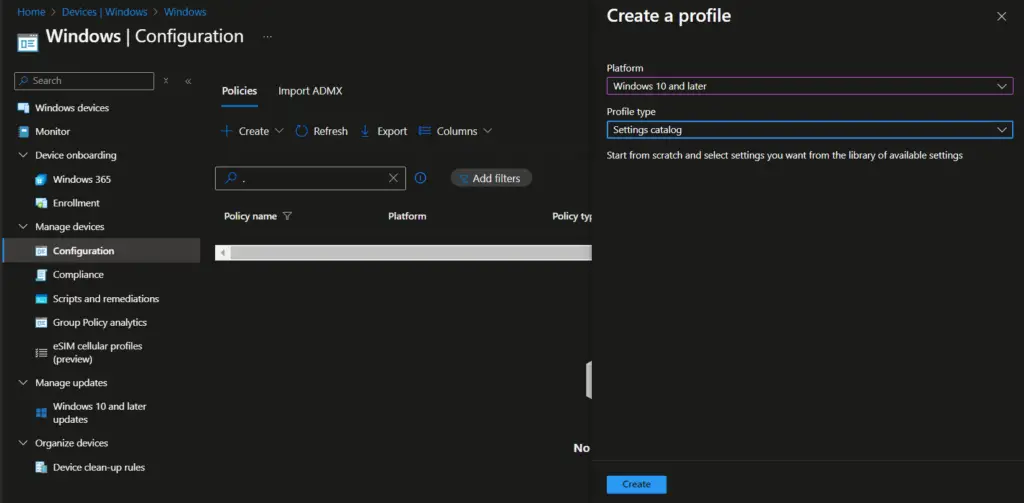
- Open Microsoft Intune Admin Console and Navigate to Windows > Devices > Configuration
- Click on Create and select the following details in the Create a Profile window.
- Platform: Windows 10 and later
- Profile type: Settings catalog
- Click on Create.
On the Create profile > Basics page, provide a suitable name for your time zone profile and click on Next.

- Perform the below steps on the Configuration settings page.
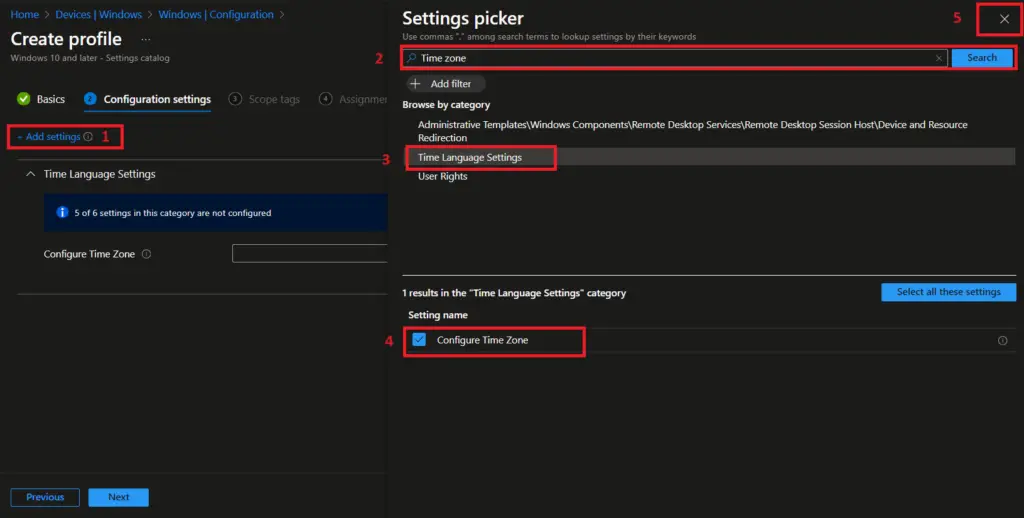
- Click on Add settings
- On the Setting picker > Search box, type Time zone and click on the Search button
- Click on Time Language Settings in the search result
- Select Configure time zone
- Close the Settings picker window using the X mark on the top right side of screen.
You are now back on the Configuration settings page and the Configure Time zone setting is now added. Enter the time zone name which you want to configure. We have added Central Standard Time.

Click on Next to go to the Assignment page and apply the policy to the appropriate Entra ID group. You need to ensure that the policy is applied to only those devices that are in the respective time zone. Else, it will impact the users in other locations.
On the Review + Create page, review the settings and click on Create to complete the policy creation process. Check the notification to ensure that the policy was successfully created.
How to Monitor Device Configuration Profile Status
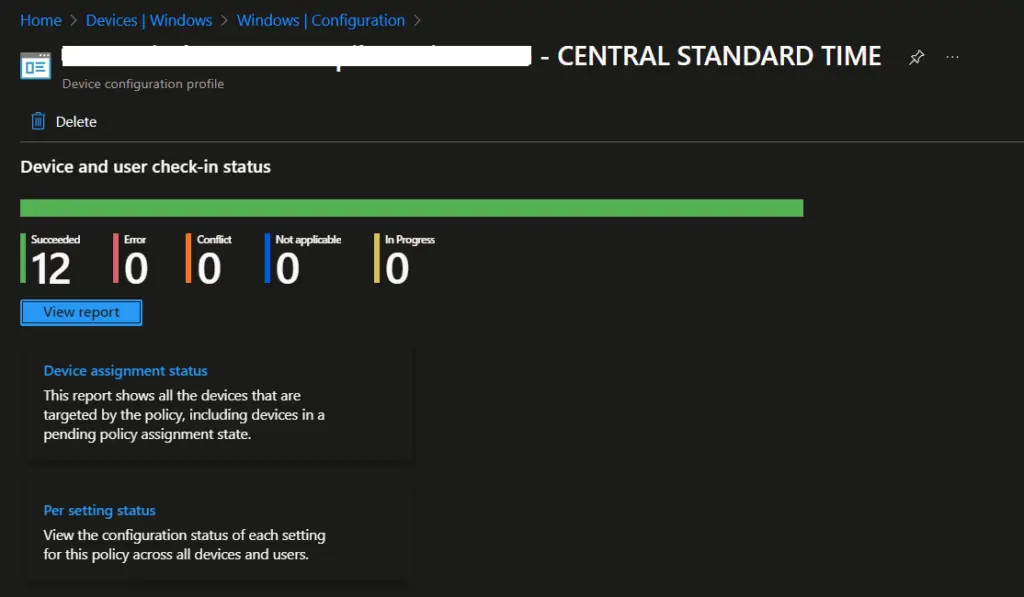
You can monitor the policy assignment status from Devices > Windows > Configuration Blade. To check the policy status, click on the policy name. The dashboard shows the number of devices where policy evaluation was succeeded, failed, or in progress. Click on View Report to see the device-wise status.
Related Posts
- Configure Microsoft Edge Sleeping Tabs using Microsoft Intune
- How to Configure Google Chrome settings using Administrative templates | Intune
- Manage Desktop Wallpaper with Microsoft Intune
- Manage Edge Chromium Favorites with Intune
Subscribe to Techuisitive Newsletter
Be the first to know about our new blog posts. Get our newsletters directly in your inbox and stay up to date about Modern Desktop Management technologies & news.