Microsoft Intune device categories allow you to manage easily and group devices. Intune device category can be used to create Azure AD group and Assignment Filters to manage policy deployments. The devices can be automatically added into Azure AD (Entra ID) groups or Assignment Filters based on the device category assigned to a device. Device categories are supported on Windows, Mac, iOS and Android.
Allow User to Select Device Category from Intune Company Portal
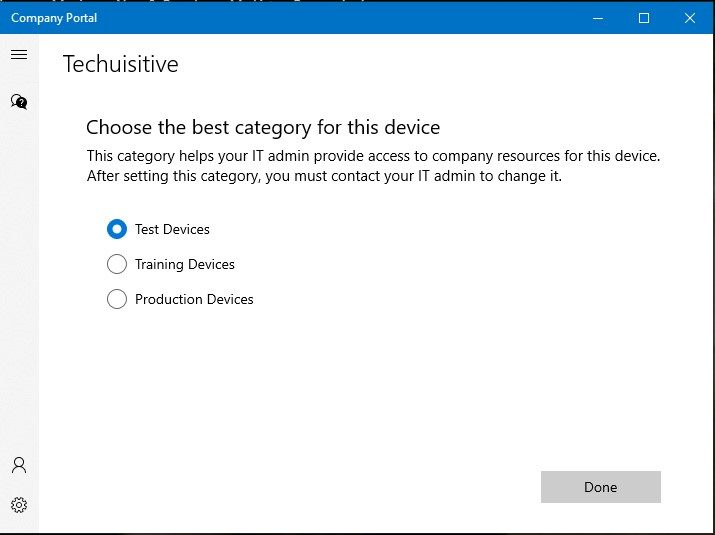
A user can select the appropriate device category for a device from the Microsoft Intune Company Portal. To allow users to select a device category, you need to enable Let users select device categories in the Company portal setting in Microsoft Intune.
This setting can be enabled from Microsoft Intune Admin Center / Tenant administration / Customization.

The users will get a prompt as in the below screenshot to choose the best category for their device once logged on to the Intune Company Portal.
How to Create Intune Device Category
Let’s understand, how to create device category in Microsoft Intune. Follow the below steps to create a device category from the Microsoft Intune admin center.
Navigate to Devices / Device Categories and click on the Create Device category
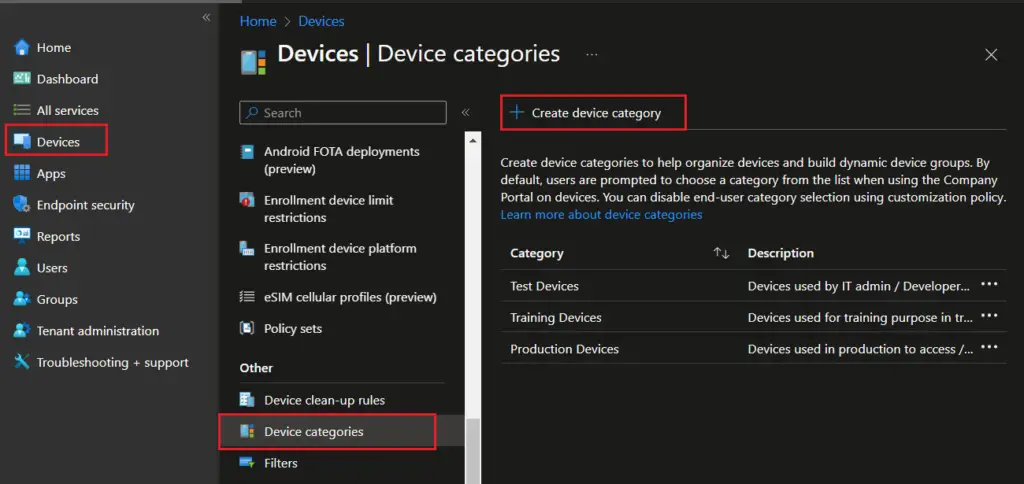
In the Create device category page, provide the appropriate Name and Description for the category and click on Next.

In the Review + create page, review the details and click on Create to create the category.

How to Check all Intune Device Categories
You can check existing device categories in Intune from the Intune admin center or the Intune Graph API PowerShell module.
Check Intune Device Categories from the Intune Admin Center
Follow the below steps to check the Intune device category from the Intune admin center.
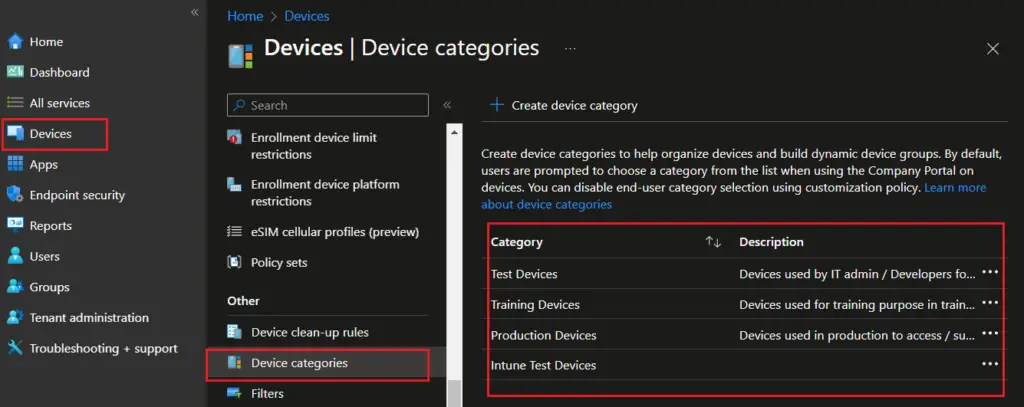
Log on to Intune admin center and navigate to Devices / Device categories. You will see all device categories listed at the right side of the screen.
Check Intune Device Categories from PowerShell
To check the device categories from PowerShell, you need to connect with MS-Graph. Follow How to Install PowerShell SDK for Microsoft Intune Graph API to know how to install and connect with MS-Graph.
Get-DeviceManagement_DeviceCategories

Check or Update the Device category for a Device
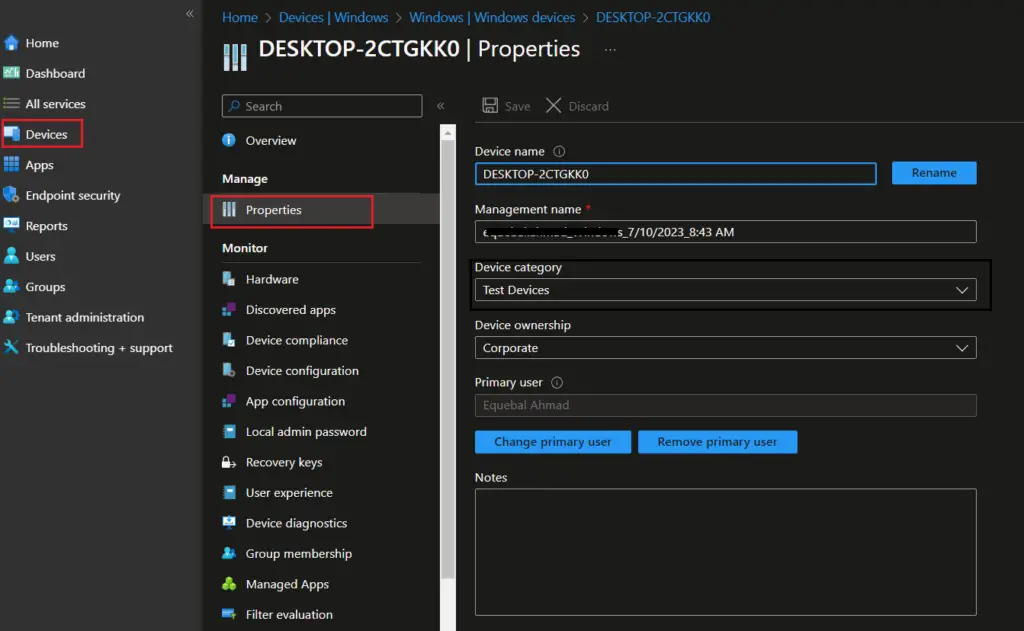
You can check or update a device category from Intune admin center. Navigate to the Devices blade, select a device, and go to Properties. You can see the currently assigned category to the device. You can also update the device category from here.
You can also check the device category for a device from PowerShell using Get-IntuneManagedDevice cmdlet.
Get-IntuneManagedDevice | Select-Object id,deviceName,deviceCategoryDisplayName

Get-IntuneManagedDevice | Where-Object {$_.deviceName -eq 'TESTVM01'} | Select-Object deviceName,deviceCategoryDisplayName
Create Intune Assignment Filters using Device Category
Intune Assignment Filters allow granular targeting of policies. You can create an assignment filter based on device categories.
In the Intune Admin Center, navigate to Devices > Filters and click on Create Filter > Managed Devices
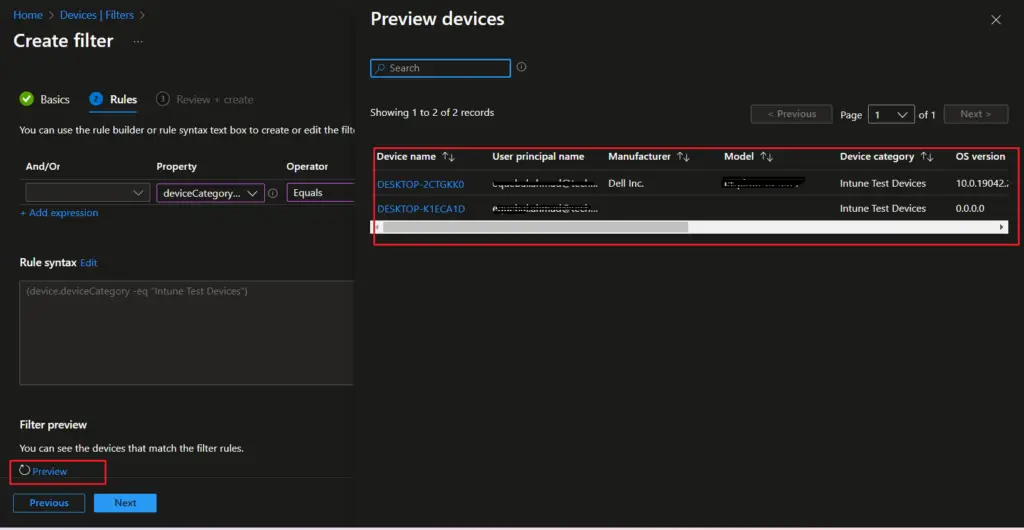
In the Create filter page, select the following: Adjust the values as per your requirements. Click on Next once you updated the query.
- Property : deviceCategory
- Operator : Equals
- Value : Intune Test Devices

You can use Filter Preview to quickly test the query result. Click on Preview at the bottom left screen to see the filter result preview.
Click on Next to move to Review + create screen and complete the Filter creation process.
Create Azure AD Group Based on Intune Device Category
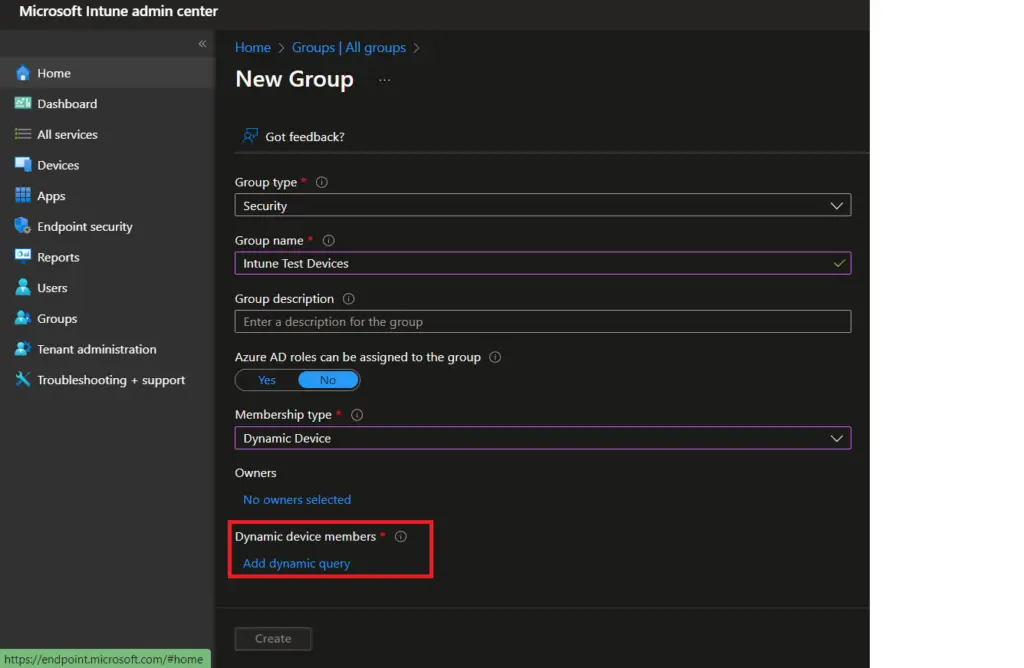
In the Intune admin center, navigate to Groups blade and click on New Group. Provide the following details.
- Group Type : Security
- Group Name: Intune Test Devices
- Azure AD roles can be assigned to the group: No
- Membership type : Dynamic device
Click on Add Dynamic Query
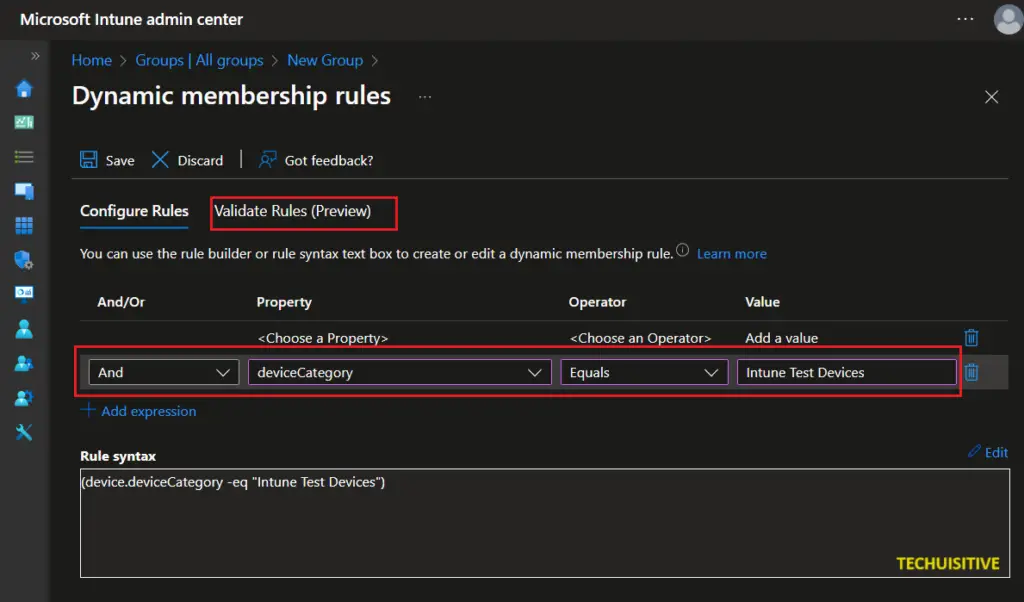
In the Configure Rules tab , Add query expression for device category and click on Validate Rules tab to validate the expression result.
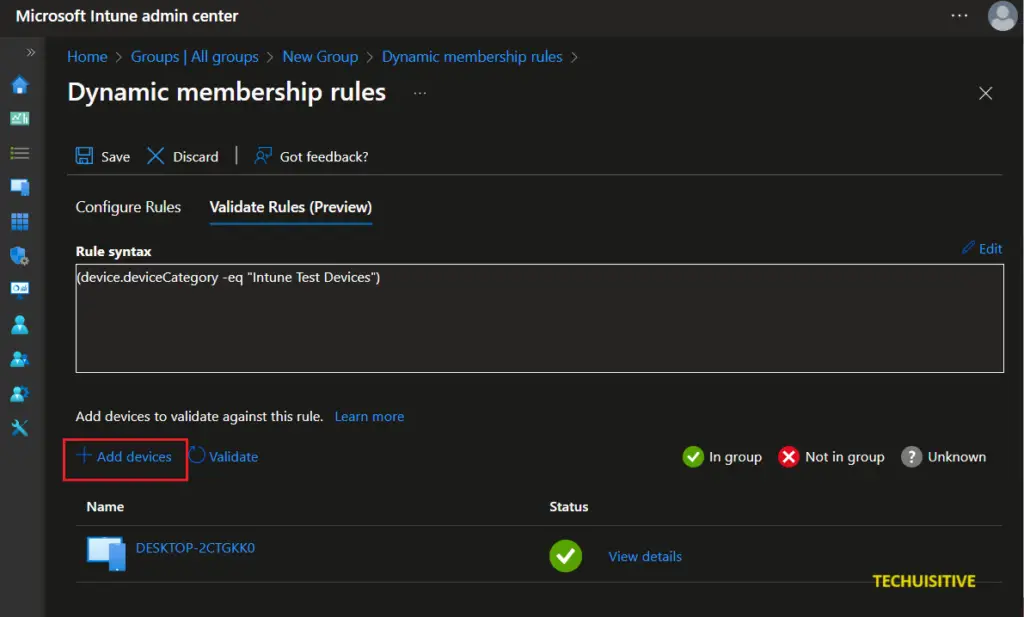
Click on Add Devices and select the desired device from the list. You can see the result in the Status column. A green tick mark shows that the device met the query criteria and will be a member of the dynamic collection.
Click on Save to return to the previous Window. Click on Create to complete AAD Group creation process.
Related Posts
- Deploying Microsoft 365 Apps Stuck in Downloading in Company Portal
- FeedSpot Top 25 SCCM Blogs to Follow in 2023
Subscribe to Techuisitive Newsletter
Be the first to know about our new blog posts. Get our newsletters directly in your inbox and stay up to date about Modern Desktop Management technologies & news.