Microsoft recently introduced Filters in Microsoft Endpoint Manager / Intune which allow more granular targeting of applications and policies to specific devices. In this blog post, we will see how we can deploy a Microsoft Store app to a group of devices using Azure AD group and MEM Filters.
We will deploy Microsoft Whiteboard to all Windows 10 Devices whose Device Category is ‘Training Devices’. For this example, we already approved the Microsoft Whiteboard application in Microsoft Store for Business (MSfB) and it’s synced with Microsoft Endpoint Manager.

Create AD Group for Windows 10 Devices
The next step is to create a dynamic AAD group for all Windows 10 devices. If you already have a group for Windows 10 devices then you can skip this step.
From Azure Active Directory > Group, create a dynamic group. Use the below query expression to include all Windows 10 devices.
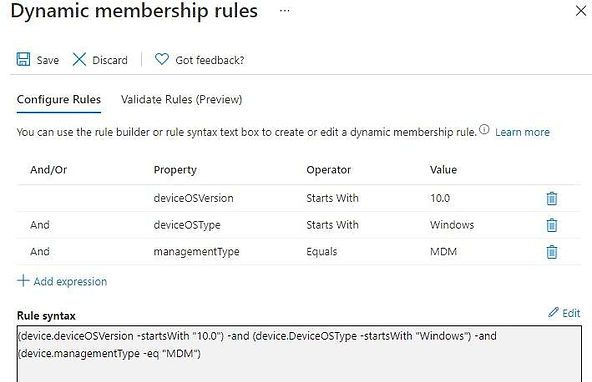
Azure AD Group – Dynamic Rule
(device.deviceOSVersion -startsWith "10.0") -and (device.DeviceOSType -startsWith "Windows") -and (device.managementType -eq "MDM")
Create Filter for Training Devices
In Microsoft Endpoint Manager admin center, Select Devices | Filters (preview) and click on Create.
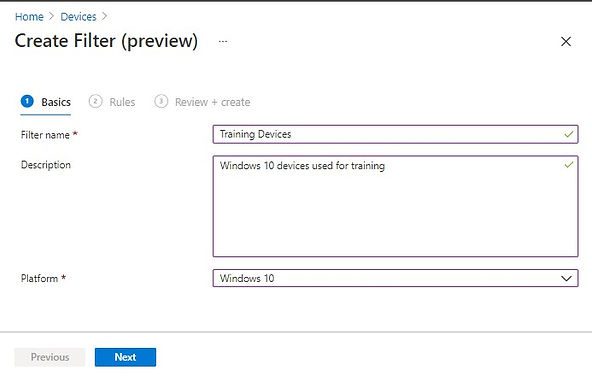
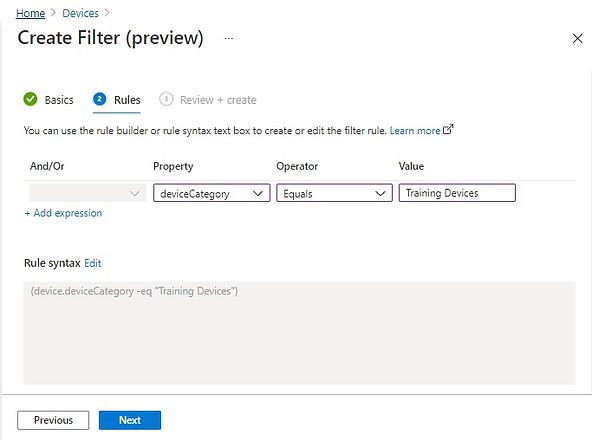
Enter Filter Name, Description, and Platform, and then clock on Next. Add the expression to include devices whose Device Category is ‘Training Devices’. Click on Next.
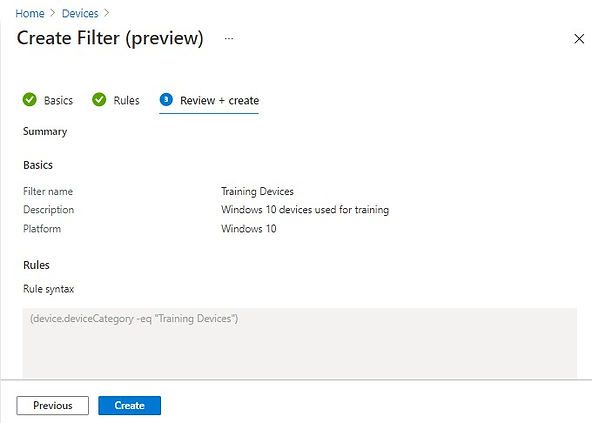
Review the details and then click on Create.
You can now see the newly created filter in Devices | Filters (preview)
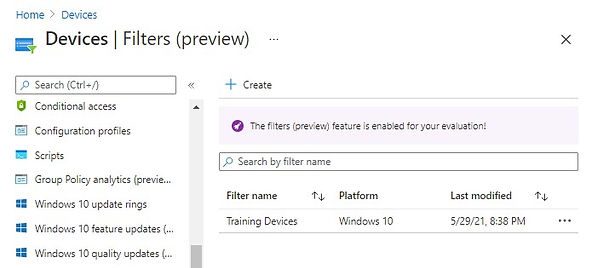
Deploy Microsoft Whiteboard on Devices using AAD group & Intune Filters
Now we have both AAD group and MEM Filter in place for the granular deployment of applications on Windows 10 devices whose device category is ‘Training Devices’.
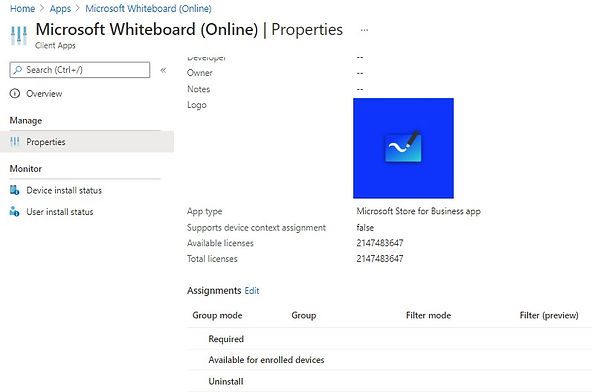
To deploy the application, Go to Apps, click on Microsoft Whiteboard, and select Properties. Click on the Edit link under the Assignments section.
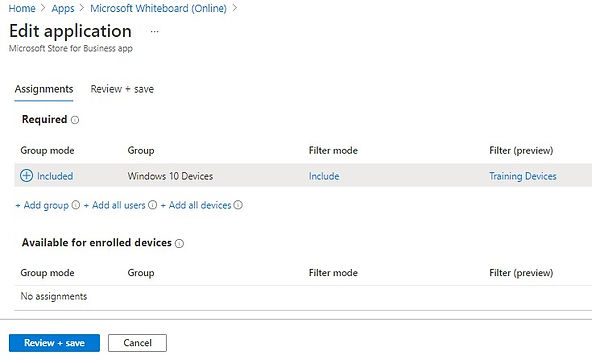
In the Edit application page, click on Add group under Required and select Windows 10 devices group. Click on Select.
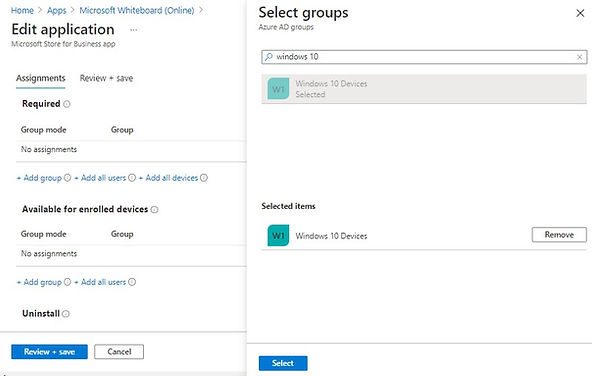
Now you can see the Windows 10 Devices group added under Required. The Filter option is now available.

Click on the None link below Filter mode.
Select the “Include filtered devices in assignment” radio button.
From available filters, select the filter which you want to use and click on Select.
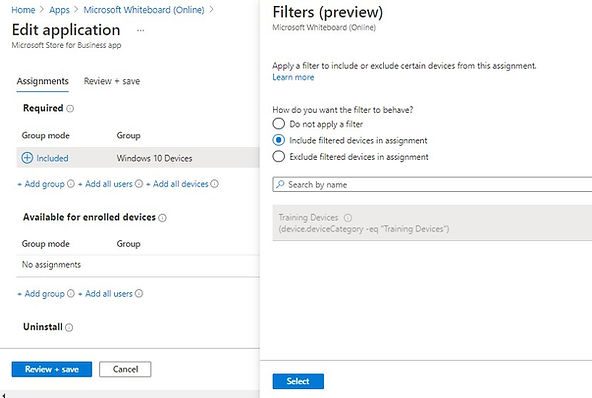
You can now see that Filter mode and Filter is now visible under Required. Filter mode is set to Include and Filter set to ‘Training Devices’.
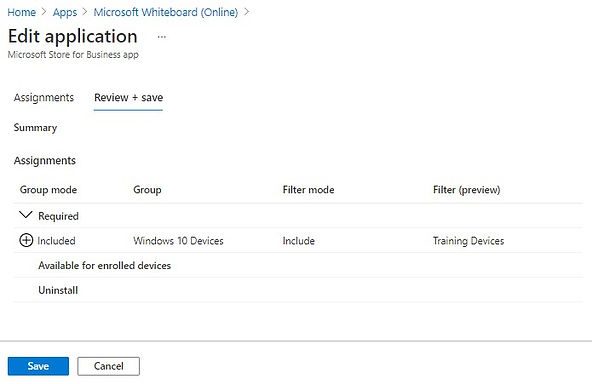
Click on Review & Save.
Review the details and click on Save to complete the deployment setup.
Deployment Status & Filters Evaluation
We will now check the deployment on one of our test Windows 10 laptops. The device category has not yet been set on this laptop. Before proceeding further, let’s understand how the include and exclude filters are evaluated. Here is the excerpt from Microsoft documentation.
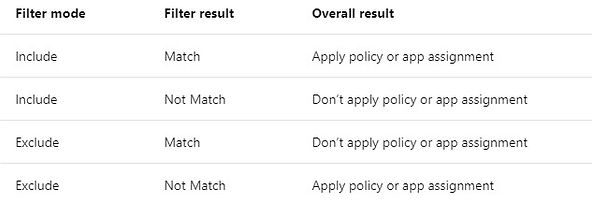
Microsoft Endpoint Manager Filters – Include and Exclude evaluation rule
To check the application deployment status, Go to Apps > Microsoft Whiteboard > Device install status. The following details are shown.
Status: Not applicable
Status Details: Filters criteria are not met
Filters (Preview): Filters evaluated

Application install status
Click on the Filters evaluated link. You can see that the Evaluation result is “Not match” hence the application was not offered to the device. You can also see that the Device Category property was empty hence Filter criteria were not matched.
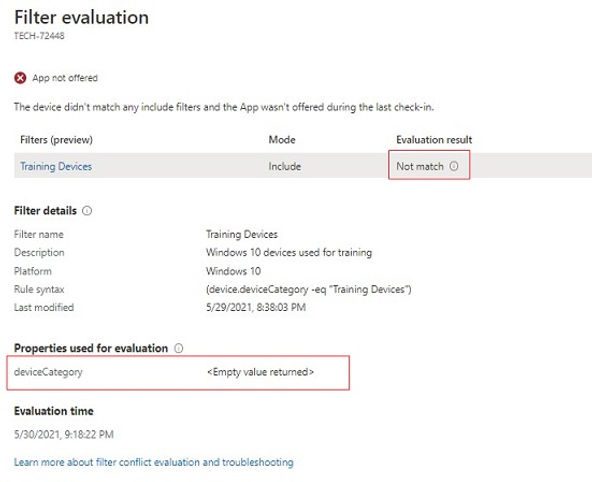
We will now set the Device category for this device, force client policy sync, and check the filter evaluation and deployment status again.
To change the Device category, go to Devices > Select Device and select Properties. Update the Device category. We changed this to “Training Devices”.
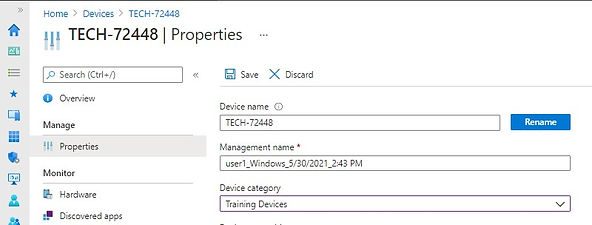
Device category
Force sync on Windows 10 devices to quickly update the policy.
Windows Settings > Accounts > Access Work or School > Select Account and then click on Sync.
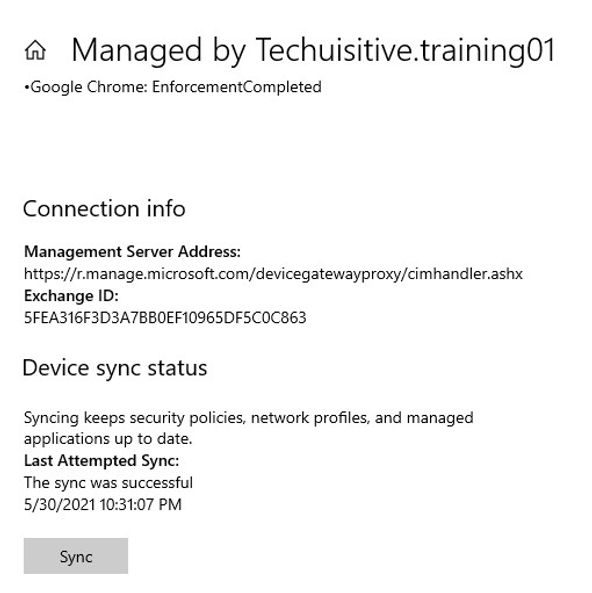
Wait for some time for Filter re-evaluation. I have waited for an hour and the application was installed after the filter evaluation succeeded.

See the Filter evaluation now. The included criteria were matched and the application was offered to the device.
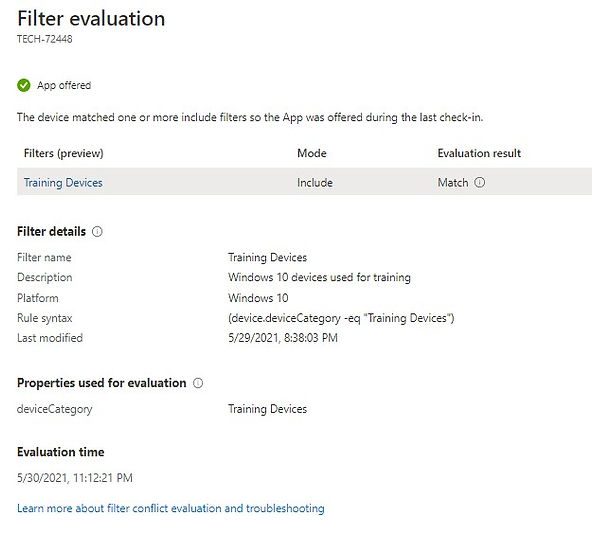
Filter evaluation
You can also find the application added in the Start menu on Windows 10 devices.

Related Posts
- Deploy Win32 App Using Intune Enterprise App Catalog
- Understanding Win32 App Detection Rules
- Understanding Win32 App Requirements Rule
- Upgrade / Replace Win32 Apps with Supersedence Relationship
- Win32 App Deployment with Dependencies
- Win32 Apps vs LOB Apps
- Win32 App Deployment failed with error code 0x80070643
- Win32 App Deployment Failed with Error 0x87D1041C
- Win32 App Deployment failed with error 0x87D300C9
- Win32 App failed with error code 0x80070653
- Deploy Google Chrome for Enterprise with Intune Win32 App
- How to Prepare Win32 App Installation source for Microsoft Intune
- SCCM Device Collection Equivalents in Microsoft Intune for App Deployment
- Deploy Microsoft SQL Server Management Studio 19.02 through Intune
- Organizing Laptop and Desktop in Intune Using Filters
Subscribe to Techuisitive Newsletter
Be the first to know about our new blog posts. Get our newsletters directly in your inbox and stay up to date about Modern Desktop Management technologies & news.