In today’s fast-paced digital landscape, keeping devices secure and up-to-date is paramount. However, the manual effort involved in patching Windows and Microsoft 365 applications can be a significant burden for IT teams. Enter Windows Autopatch, a cloud-based service integrated with Microsoft Intune, designed to automate and simplify your update management process.
This blog post will delve into the features of Windows Autopatch, explain how it revolutionizes patching, guide you through the essential configuration steps, and provide insights into monitoring and troubleshooting for a smooth experience.
What is Windows Autopatch?
- Windows Autopatch is a “set-and-forget” service that leverages Microsoft’s expertise to deliver timely updates for:
- Windows 10/11 Quality Updates: Monthly security and non-security fixes.
- Windows 10/11 Feature Updates: Annual releases that bring new features and improvements.
- Microsoft 365 Apps for enterprise: Updates for Word, Excel, PowerPoint, Outlook, etc.
- Microsoft Edge: The latest browser updates.
- Microsoft Teams: Ensuring your collaboration tools are always current.
- Drivers and Firmware: Crucial updates for device stability and performance.
The core idea is to offload the heavy lifting of update management to Microsoft, allowing your IT team to focus on more strategic initiatives.
How Does Windows Autopatch Improve the Patching Process?
Windows Autopatch brings a host of benefits that significantly enhance your patching strategy:
- Automated Patch Deployment: No more manual scheduling and pushing of updates. Autopatch handles the entire process, from testing to deployment, across various update types.
- Phased Rollouts and Deployment Rings: Autopatch uses a robust system of “deployment rings” (Test, First, Fast, Last by default) to gradually roll out updates. This minimizes risk by deploying to a small group first, monitoring for issues, and only then expanding to the wider organization. If problems are detected, rollouts can be automatically paused.
- Reduced IT Overhead: By automating patch cycles, Autopatch frees up valuable IT resources, allowing them to focus on innovation and higher-value tasks rather than routine update management.
- Improved Security and Compliance: Devices are consistently kept up-to-date with the latest security patches, closing vulnerabilities quickly and helping your organization meet compliance objectives. Microsoft aims for a high service level objective (SLO), such as keeping at least 95% of devices on the latest quality update.
- Minimized End-User Disruption: Autopatch intelligently handles reboots and respects active hours, striving to apply updates with minimal impact on user productivity. Hotpatch updates for Windows 11 further reduce reboots for quality updates.
- Built-in Intelligence and Telemetry: Microsoft leverages telemetry from millions of devices to identify and pause problematic updates, preventing widespread issues in your environment.
- Centralized Management and Reporting (via Intune): While Microsoft manages the orchestration, you retain visibility through the Microsoft Intune admin center, with detailed reports on update status, compliance, and device health.
Essential Configuration for Windows Autopatch
Before you can use Windows Autopatch, ensure your environment meets the prerequisites and follow these key configuration steps:
Prerequisites:
- Licensing: Your users must have eligible licenses, such as Windows 10/11 Enterprise E3 (or higher), F3, or Microsoft 365 Business Premium, A3, or A5.
- Microsoft Entra ID P1 or P2.
- Microsoft Intune: Devices must be enrolled in Intune, and Intune must be set as the Mobile Device Management (MDM) authority, or co-management must be enabled.
- Corporate-Owned Devices: Autopatch primarily supports corporate-owned devices.
- Network Connectivity: Devices require connectivity to various Microsoft service endpoints. Ensure your firewalls and proxies allow the necessary traffic.
- Device Health: Devices must be powered on, have network access, and check in with Intune regularly.
Configuration Overview
- Tenant Enrollment:
- To start using the service, you must create an update policy owned by Windows Autopatch. You can create the policy from the Tenant administration/Windows Autopatch blade.
- Device Registration:
- Once your tenant is enrolled, you need to register your devices with the Autopatch service. This can be done by assigning devices or Microsoft Entra device groups to Windows Autopatch policies. The devices must already be enrolled with Microsoft Intune.
- Autopatch Groups and Deployment Rings:
- By default, Autopatch uses a set of pre-defined deployment rings (Test, First, Fast, Last). You’ll assign devices to Microsoft Entra groups that correspond to these rings. Autopatch then dynamically manages the update cadence for devices within each ring.
- Enabling Other Updates:
- Within the Autopatch settings in Intune, you can enable updates for Microsoft 365 Apps, Microsoft Edge, Microsoft Teams, and Drivers/Firmware. This will generate corresponding device configuration profiles to manage their update behavior.
Step-by-Step Guide to Create Autopatch Policies
Create Entra ID Group for Autopatch Device Registration
An Entra ID group is required to register Windows devices to the Windows Autopatch service. The group can be either assigned or Dynamic. Windows Autopatch scans these groups to discover eligible devices, automatically enrolling them for management and applying relevant update policies.
While you can have a dynamic group, the assigned group provides more flexibility as you can add the device to the group directly or add another dynamic group as a member.
Create a group and give it a meaningful name, such as “Windows Autopatch Device Registration”.
Enable Windows Autopatch
To start using the service, you must create an update policy owned by Windows Autopatch. The update policy can be one of the following:
- Update rings
- Windows quality updates
- Windows feature updates
- Driver and firmware updates
Follow the steps below to create a Windows Autopatch policy.
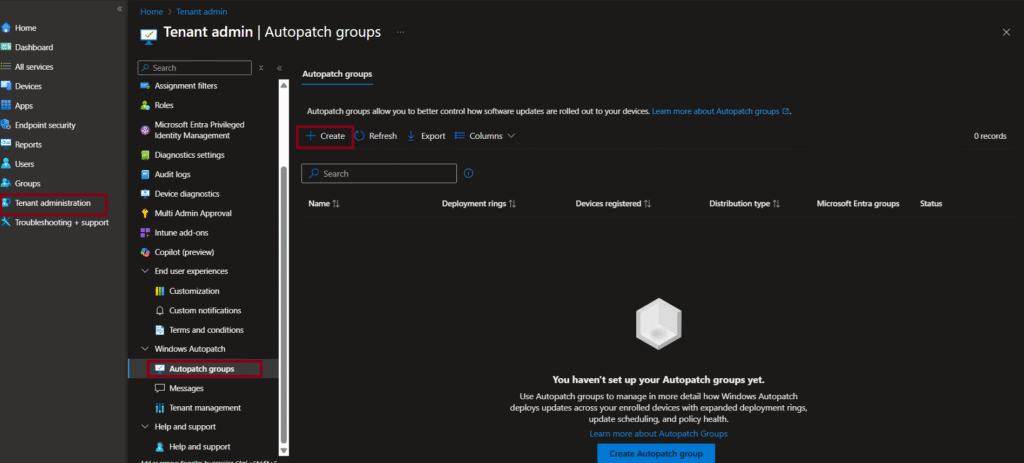
- On the Intune Admin Center, navigate to Tenant administration/Windows Autopatch/Autopatch groups.
- Select +Create to create a Windows autopatch policy.
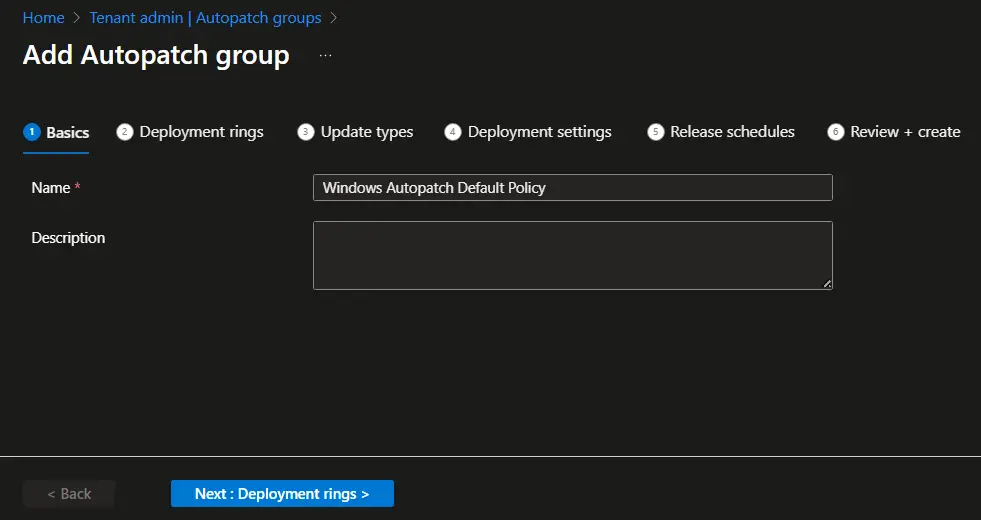
- On the Basics page, enter the policy name and description. Please note that the policy name will be used in the deployment rings, configuration policies, and groups created by Autopatch. Hence, use a meaningful name to avoid misunderstanding at a later stage.
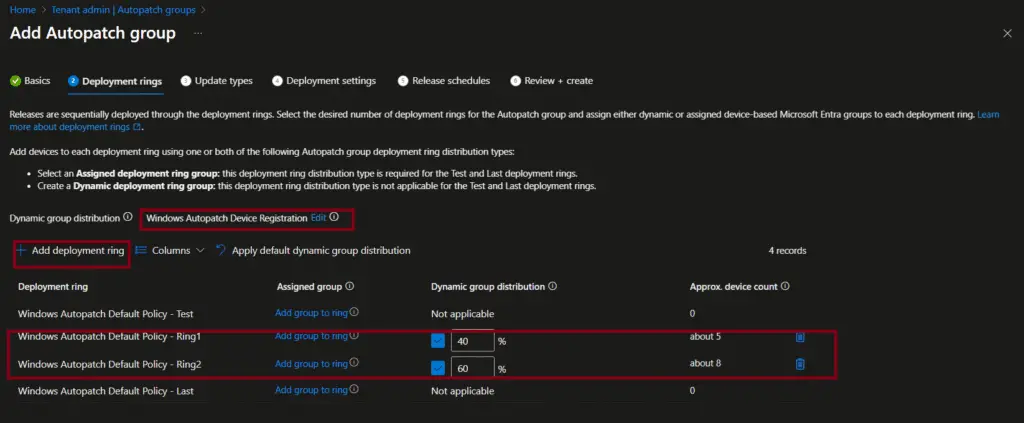
- Perform the following steps on the Deployment rings page.
- Select Add group and select the autopatch device registration group you created earlier.
- Click on Add deployment ring to add additional deployment rings. The Test and Last deployment rings are created by default. You can manually add the device to the Test and Last rings. Other ring memberships will be managed automatically by Windows Autopatch.

- You should now see a screen similar to the one below. The sum of the Dynamic group distribution field must be 100 percent. You can see that we have configured to distribute 40% of the devices on the first ring and the remaining 60% in the second ring. You may start with even a much lower percentage in a production environment.
- Click ‘Next’ to proceed to the Update Types page.
On the Update Types page, select the additional update types. The Quality update is selected by default and cannot be unchecked. Choose additional update types, such as feature updates, driver updates, Microsoft 365 App updates, and Microsoft Edge updates.”

On the Deployment Settings page, you can adjust the available settings. The Quality update settings can be modified on the next page. For the Feature updates, select the target Windows version you want to make available.

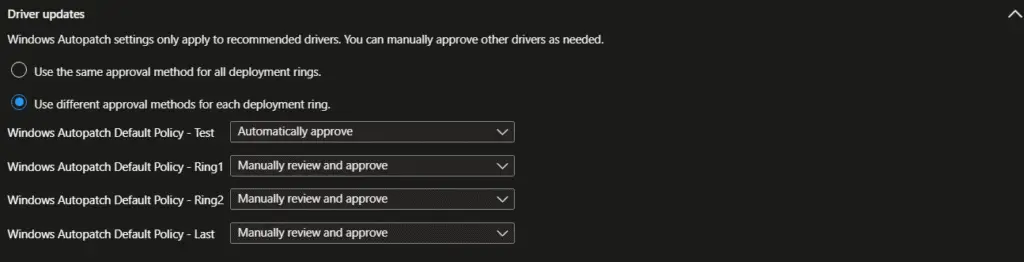
The Driver updates settings can be updated if required. You can either have the same approval method for all deployment rings or configure different options for each deployment ring.
The configuration for Microsoft 365 apps updates cannot be configured on this page. You can make the adjustments on the next page.

For Microsoft Edge updates, you can either have the same channel for all deployment rings or configure a different channel.

On the Release Schedules page, you can apply different release schedule presets. The settings will be updated based on the release schedule preset you selected. The following release schedule presets are available.
- Informational worker
- Shared device
- Kiosks and Billboards
- Reboot – Sensitive device

On the Review + create page, review the settings and click on the Create button to create the autopatch policies and groups.

Review the policies and Groups created by Windows AutoPatch
Windows Autopatch sets up various policies, groups, and configuration profiles to automate and streamline the process of updating Windows and Microsoft 365 applications. Let’s review these policies, groups, and configuration profiles that were created by Windows Autopatch.
Let’s see the Update rings first. Windows Autopatch created four update rings based on the configuration we selected earlier. The policies are:
- Windows Autopatch Update Policy – Windows Autopatch Default Policy – Test
- Windows Autopatch Update Policy – Windows Autopatch Default Policy – Ring1
- Windows Autopatch Update Policy – Windows Autopatch Default Policy – Ring2
- Windows Autopatch Update Policy – Windows Autopatch Default Policy – Last

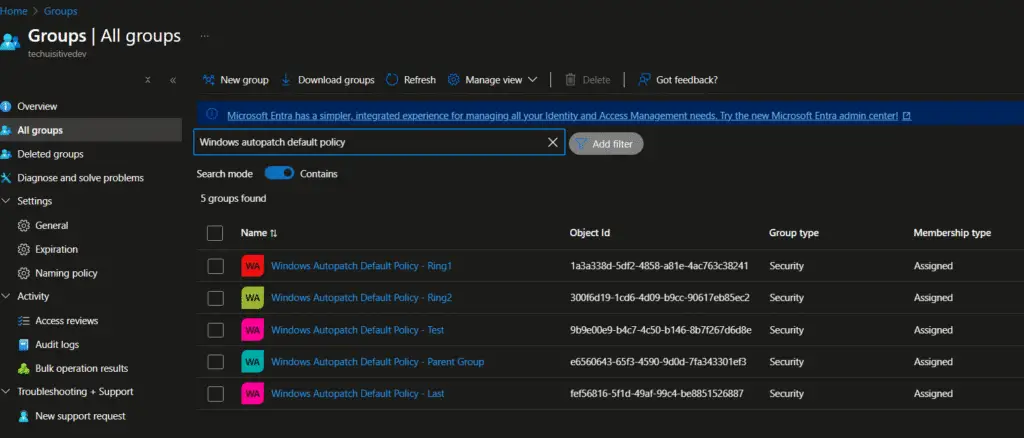
Windows Autopatch also created corresponding Entra ID groups for each update ring.
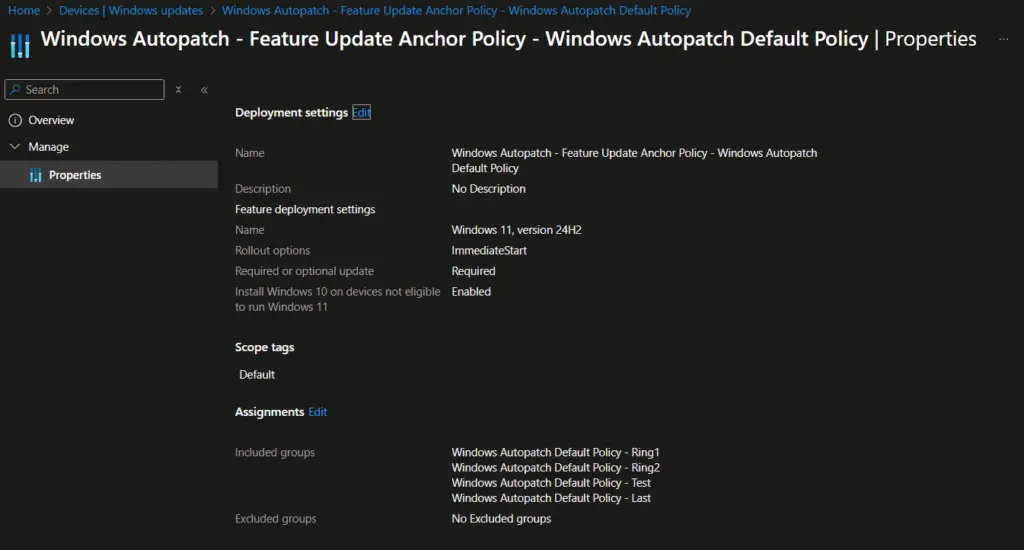
A policy to enable Feature update deployment was also created with the settings configured earlier.
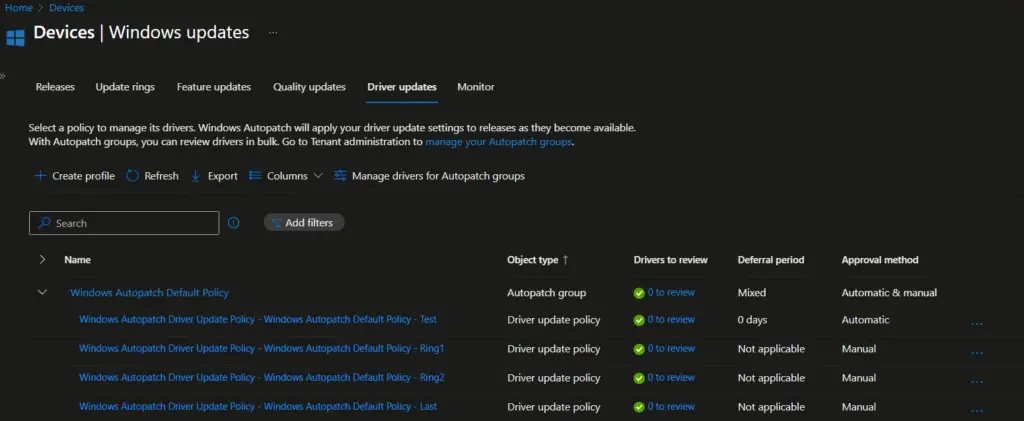
The next one is driver update policies. Similar to the updated rings, the four drivers’ update policies were created to automate driver management through Intune.
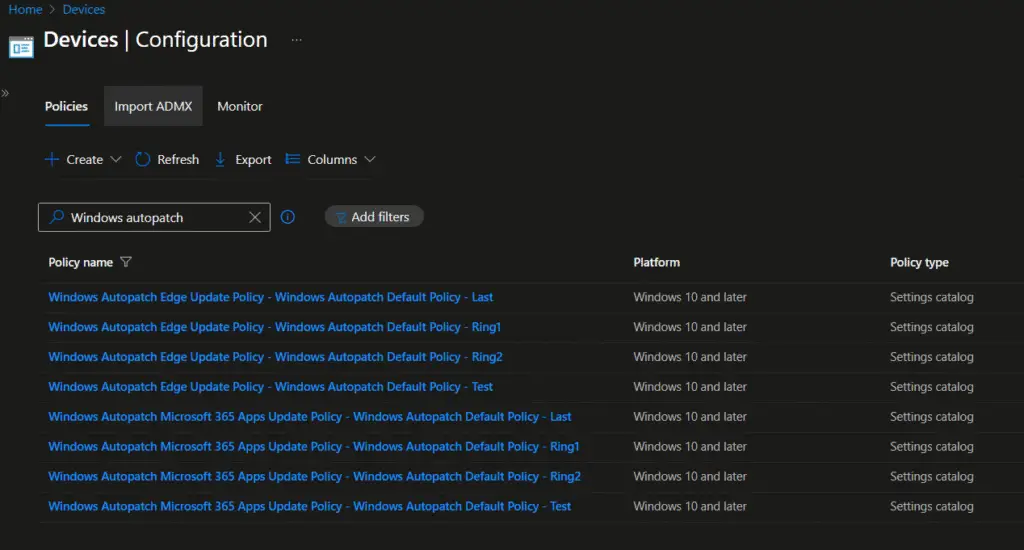
We have selected Microsoft Edge and Microsoft 365 apps updates as well during the Windows Autopatch configuration. Hence, the policies for Microsoft Edge and M365 Apps are also created. However, these updates are managed through Device configuration/Setting catalog policies.
The following settings are configured in Microsoft Edge update policies.
MDM Win over GPO: This setting overrides the GPO settings to avoid policy conflicts.
Target Channel (Device) : Stable
Target Channel Override: Enabled

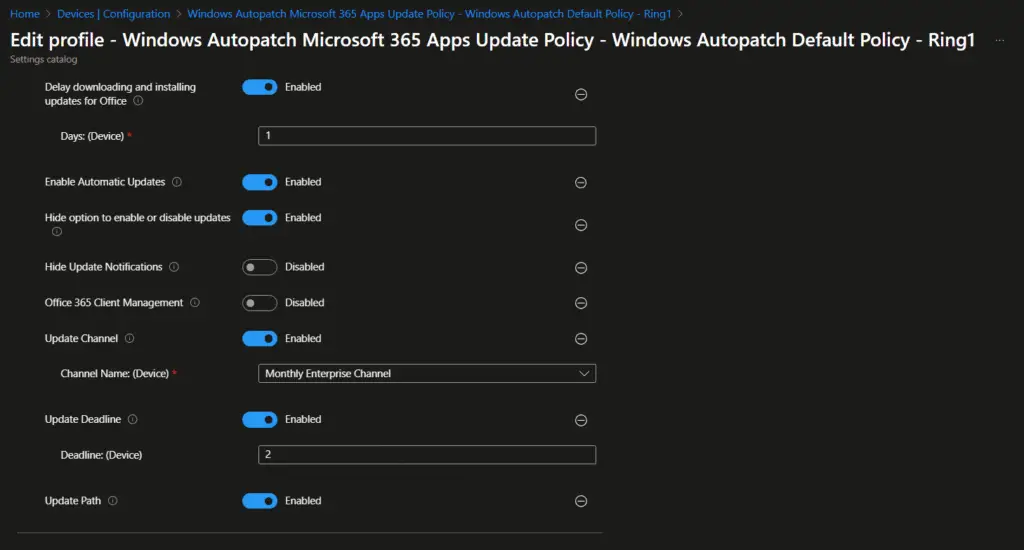
Similarly, the following settings have been configured for the Microsoft 365 Apps update policy.
MDM Win over GPO: This setting overrides the GPO settings to avoid policy conflicts.
Device downloading and installing updates for office: Enabled
Enable Automatic Update: Enabled

- Hide option to enable or disable updates: Enabled
- Hide Update Notification: Disabled
- Office 365 Client Management: Disabled
- Update channel: Enabled
- Channel Name: Monthly Enterprise Channel
- Updated deadline: Enabled
- Deadline: 2 days
- Update path: Enabled
Related Posts
- Understanding Windows Autopatch with Intune
- Manage Edge Chromium favorites with Endpoint Manager | Intune
- Configure Edge Chromium Homepage & Startup Page
- Configure Microsoft Edge Sleeping Tabs using Intune
- Configure Google Chrome settings using Administrative templates | Intune | Endpoint Manager
- Block USB Device with Exception
- Deny Write Access to USB Devices Using Intune Catalog Settings
- Manage Windows 10 /11 Desktop Wallpaper with Microsoft Intune
- Manage Local Admin Password with Intune & Windows LAPS
- How to Create a Custom RBAC Role in Intune for LAPS Password Administrator
Subscribe to Techuisitive Newsletter
Be the first to know about our new blog posts. Get our newsletters directly in your inbox and stay up to date about Modern Desktop Management technologies & news.