Exporting and importing endpoint security policies in Microsoft Intune can save administrators significant time when migrating, testing, or replicating configurations across tenants. While the Intune admin center doesn’t yet provide a direct export option for endpoint security policies, PowerShell Intune Samples scripts offer a reliable workaround. In this guide, we’ll walk through the step-by-step process of exporting policies to JSON files and importing them back into Intune, helping you streamline policy management and reduce repetitive configuration tasks
Let’s understand how to export the Endpoint security policies using a PowerShell sample script and then import the policy to another tenant.
Export Endpoint Security Policies in JSON File
Follow the steps below to export Endpoint security policies in a JSON file using a PowerShell script. Please note that the steps below will export all Endpoint security policies in the folder path you provide.
- Download the Intune PowerShell scripts from PowerShell Intune Samples and extract all files to the local drive.
- Run PowerShell as an Administrator.
- Set PowerShell execution Policy to ByPass ( Set-ExecutionPolicy bypass )
- Install PowerShell AzureAD and Microsoft Graph Module if not already installed.
- Change the location to the “DeviceConfiguration” under “Powershell-intune-samples-master”
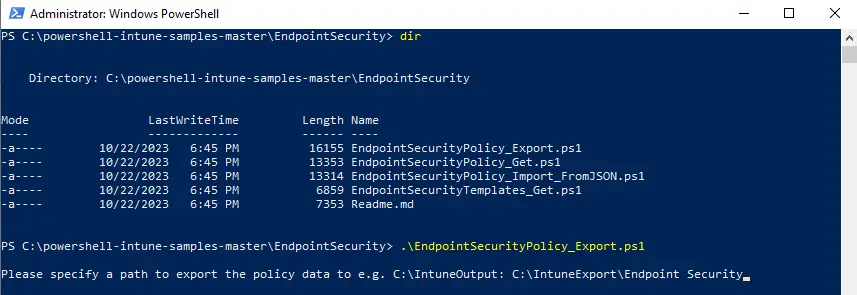
- Run the script .\EndpointSecurityPolicy_Export.ps1
- If prompted, log in with your Azure AD / Entra ID credentials.
- Specify a path to export the policy data.
.\EndpointSecurityPolicy_Export.ps1
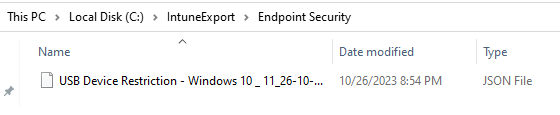
The script will export all Endpoint security policies in the folder path you provided. The script exports each policy in a separate JSON file. The current date and time are appended to each file name.

You can open File Explorer and browse to the folder to see all exported policies in a JSON file.
Import Endpoint Security Policies in Intune
You can import the exported policy into either a different tenant or the same tenant to create a new policy and customize it as needed. If you are importing into the same tenant, it’s best practice to update the policy name to avoid confusion. This can be done quickly by opening the JSON file in Notepad and editing the displayName field before re-importing.
When you import the policy, it remains unassigned. You must assign the policy to a device or user group as per your requirements.
Follow the process below to import the policy into Microsoft Intune.
- Follow the initial steps provided to export the policies.
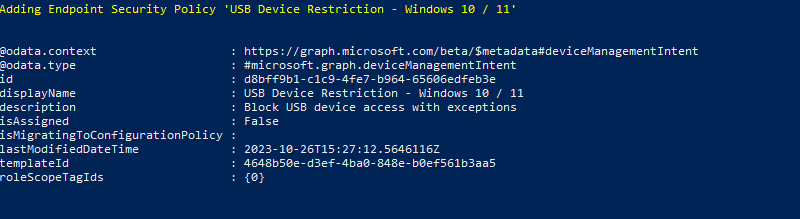
- Run the script .\EndpointSecurityPolicy_Import_FromJSON.ps1
- If prompted, log in with your Azure AD / Entra ID credentials.
- Specify a path to export the policy data.
.\EndpointSecurityPolicy_Import_FromJSON.ps1

The script will read the policy and show information on the screen.

Later, you will see the message that the policy is being imported to Intune. The script returns to the prompt once imports are complete.
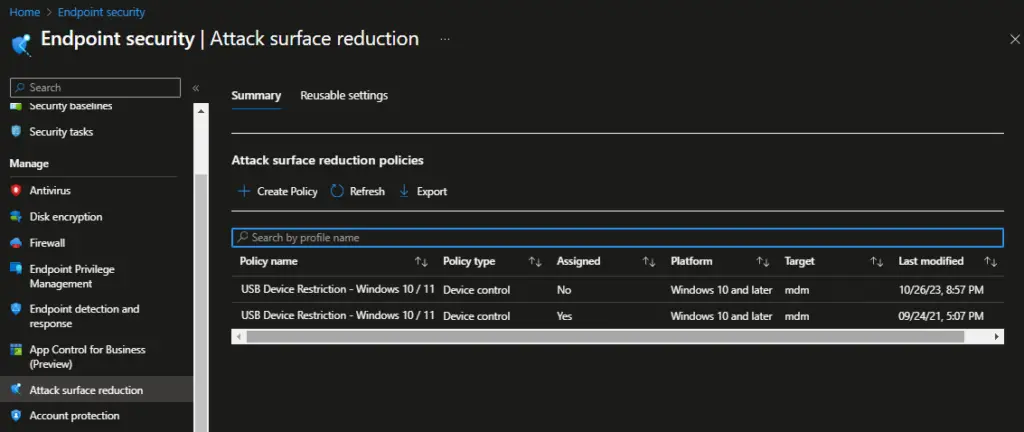
You can verify the imported policy directly in the Intune admin center. In this example, two policies with the same name are visible—the original policy and the one imported from the JSON file. Notice that the imported policy remains unassigned by default, allowing you to configure assignments as needed.
Related Posts
- How To Export Serial number of Multiple Devices using PowerShell SDK for Intune Graph API
- How to Export Managed Device Details from Intune
- Export Device Configuration Profiles List in Intune
- How to Export Settings Catalog Policy in Intune
- Export and Import Device Compliance Policies in Intune
- How to Export Device Configuration Profiles in Intune
- How to Export Endpoint Security Policies in Intune
- How to Provision Windows 10 / Windows 11 Device using Intune and Windows Autopilot