Windows Autopilot is a modern deployment solution from Microsoft that simplifies how IT teams provision, configure, and manage Windows 10/11 devices. By integrating with Microsoft Intune and Azure Active Directory (Entra ID), Autopilot enables zero‑touch setup, repurposing, and recovery of devices with minimal infrastructure.
In this step‑by‑step guide, you’ll learn how to configure Autopilot profiles, enrollment settings, and device registration to streamline your OS deployment workflow and deliver a seamless out‑of‑box experience (OOBE) for end users.
Notes: Microsoft has introduced a new version of Windows Autopilot called Windows Autopilot Device Preparation (also known as Autopilot v2). For more details, check out this article on Windows Autopilot Device Preparation: Windows Autopilot Device Preparation aka Autopilot v2 Step by Step Guide
- Configure Azure Active Directory Automatic Enrollment
- Configure Azure Active Directory custom branding (Optional)
- Create a device group for Windows Autopilot
- Create Windows Autopilot Deployment Profile
- Configure Enrollment Status Page (ESP)
- Manually Register the Device with Windows Autopilot
- Reset the VM to factory settings
- Out of Box Experience (OOBE)
- 🎉 Enrollment Complete
- Frequently Asked Questions (FAQs)
- What is Windows Autopilot?
- Do I need to manually register devices for Autopilot?
- What is the Enrollment Status Page (ESP) and why is it important?
- Can I customize the Out‑of‑Box Experience (OOBE) for users?
- What happens if ESP installation takes longer than expected?
- Can users bypass ESP if an installation fails?
- How do dynamic groups help in Autopilot deployments?
- What are the stages of ESP during enrollment?
- What happens if a device is reset to factory settings?
- How does Autopilot improve IT efficiency compared to traditional imaging?
- Related Posts:
Configure Azure Active Directory Automatic Enrollment
Automatic enrollment enables users to seamlessly enroll their Windows devices into Microsoft Intune. As soon as a device joins Azure Active Directory (Azure AD), it is automatically registered and enrolled in Intune for management.
Follow these steps to configure Automatic MDM enrollment from the Azure portal.
- Sign in to the Azure portal, and select Azure Active Directory > Mobility (MDM and MAM) > Microsoft Intune.
- Configure MDM user scope. If you select Some, then you need to select an Azure AD Group.
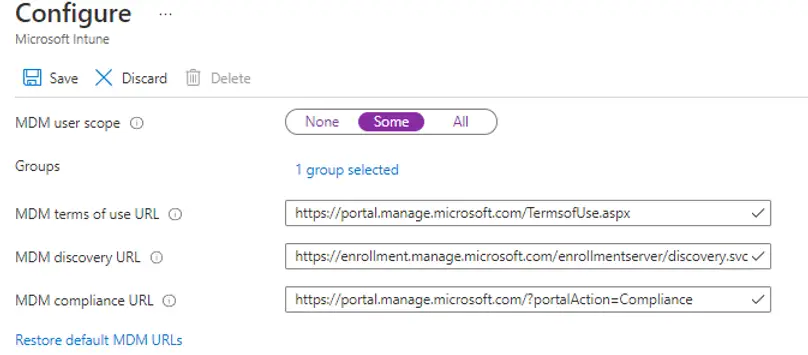
Note: MDM user scope must be set to an Azure AD group that contains user objects.
Configure Azure Active Directory custom branding (Optional)
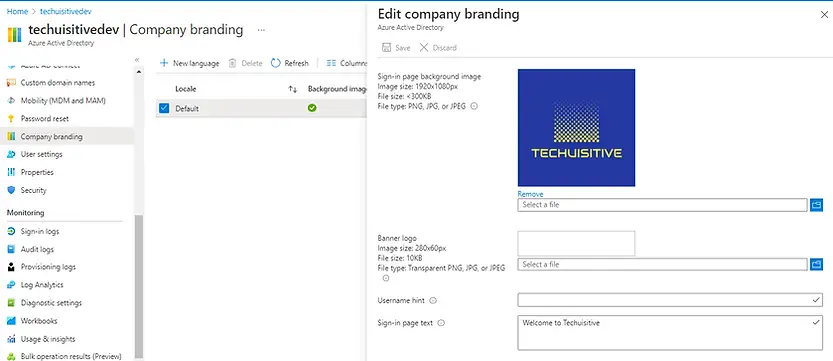
The Azure Active Directory (Azure AD) custom branding feature allows organizations to create a personalized login experience by adding company‑specific branding to the sign‑in page. You can configure elements such as logos, background images, and custom text directly from the Azure portal → Azure AD → Company Branding settings. This ensures a consistent, professional identity across all user sign‑ins.
Create a device group for Windows Autopilot
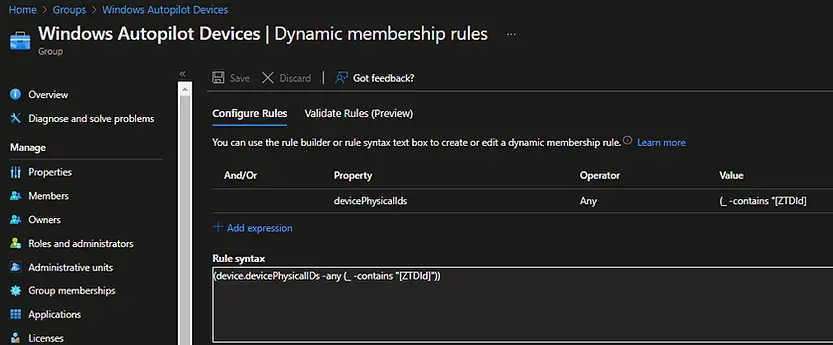
To assign an Intune Autopilot Deployment Profile, you must first create a device group in Azure Active Directory (Azure AD). The recommended approach is to use dynamic membership rules based on Autopilot device attributes (such as ZTDId). This eliminates the need to manually add devices, since each device automatically becomes a member of the group once its hardware hash is imported into Windows Autopilot.
Dynamic Membership Rule Expression:
(device.devicePhysicalIDs -any (_ -contains "[ZTDId]"))
Create Windows Autopilot Deployment Profile
Windows Autopilot deployment profiles are used to configure and manage Autopilot devices during provisioning. To enable Autopilot for a device, you must assign a Windows Autopilot Deployment Profile that defines settings such as enrollment options, user experience, and device configuration.
Follow these steps to create and assign an Autopilot deployment profile in Microsoft Intune.
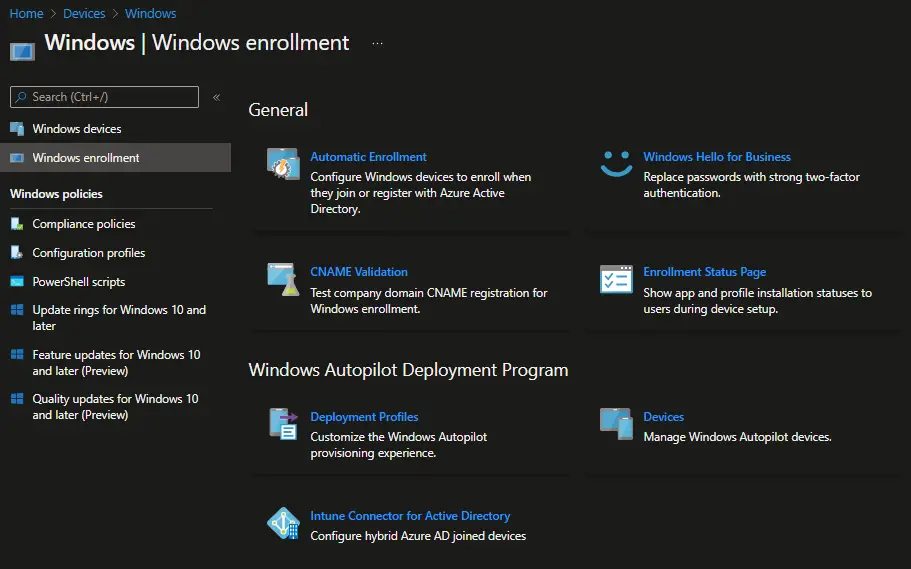
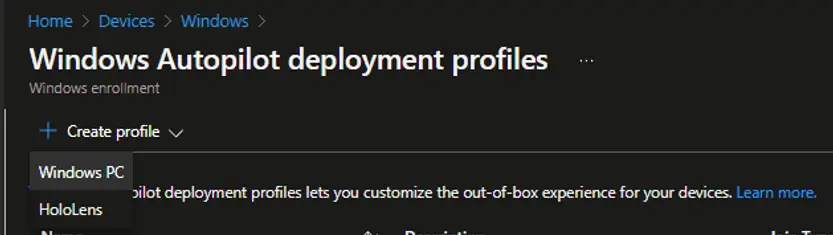
In the Microsoft Intune admin center, choose Devices > Windows > Windows enrollment > Deployment Profiles
Click on Create Profile and select Windows PC to begin configuring a new Windows Autopilot Deployment Profile in Microsoft Intune. This profile defines how devices are provisioned, including enrollment settings, user experience, and configuration policies, ensuring a seamless Autopilot deployment process.
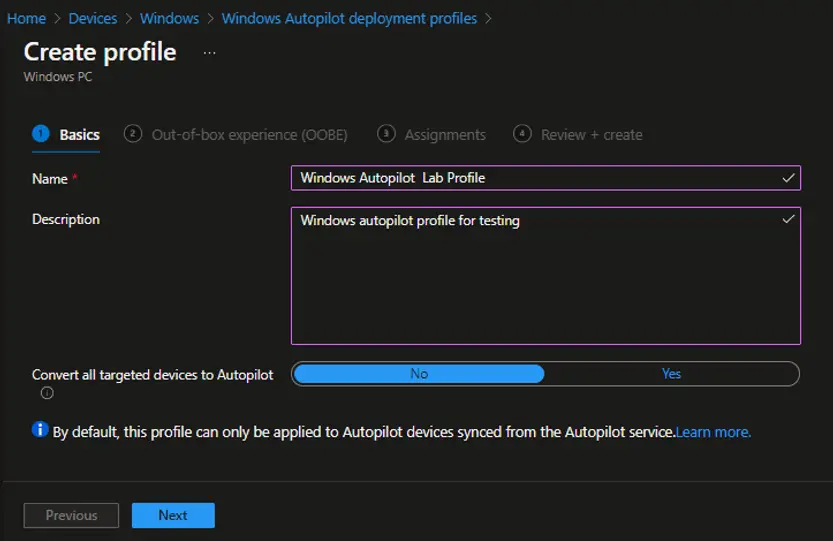
On the Basics page, enter a Name for the deployment profile and, optionally, provide a Description to identify its purpose. Once complete, click Next to proceed with the configuration.
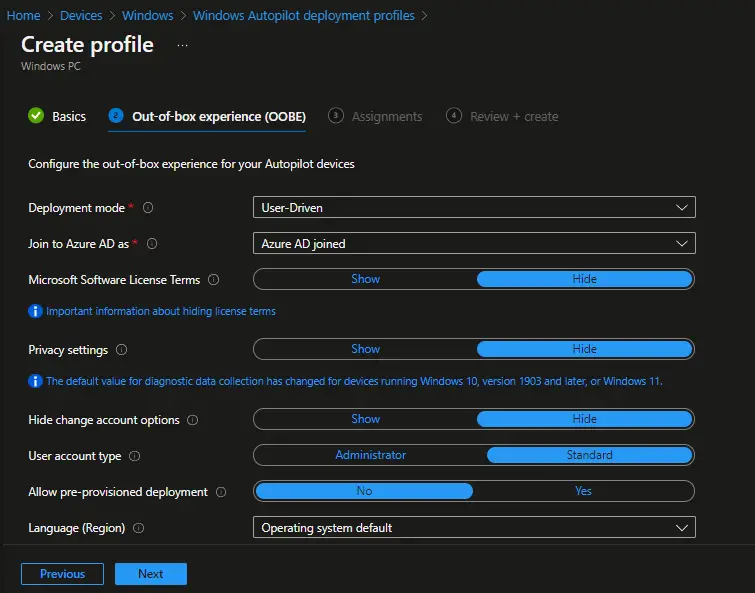
On the Out‑of‑Box Experience (OOBE) page, proceed with the default settings to simplify configuration. These defaults are optimized for most deployment scenarios and ensure a consistent Windows Autopilot setup without requiring additional customization.
Deployment Profile Settings (Windows Autopilot)
- Deployment Mode: User Driven Devices with this profile require users to enroll using their Microsoft Entra ID (formerly Azure Active Directory) credentials.
- Join to Azure AD: Azure AD joined Ensures devices are automatically joined to your organization’s Azure AD tenant.
- Microsoft Software License Terms: Hide Skips the license terms screen during OOBE for a smoother setup.
- Privacy Settings: Hide Removes privacy prompts to streamline the enrollment process.
- Hide Change Account Options: Hide Prevents users from switching accounts during setup.
- User Account Type: Standard Configures enrolled devices with standard user privileges by default.
- Allow White Glove OOBE: No Disables pre‑provisioning (White Glove) mode for this profile.
- Language (Region): Operating System default Uses the OS default language and region settings.
- Automatically Configure Keyboard: Yes Keyboard layout is automatically configured during setup.
- Apply Device Name Template: Yes Applies a predefined naming convention to enrolled devices for consistency.
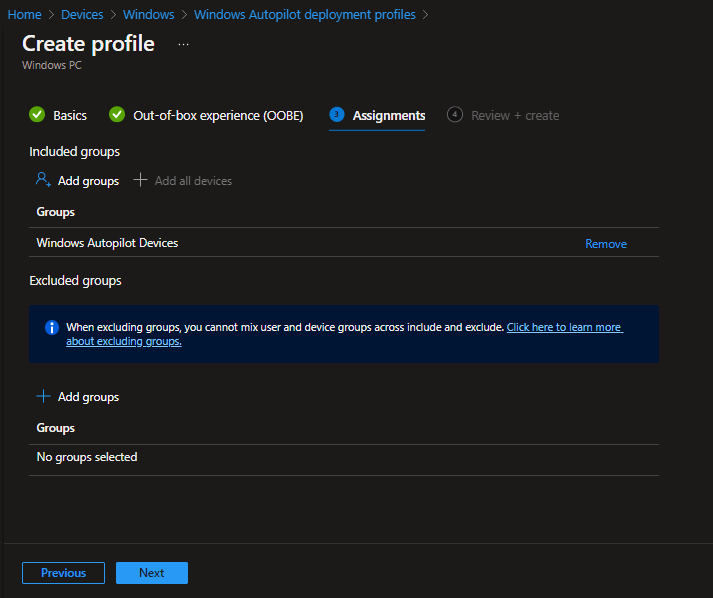
On the Assignment page, select and add the Azure Active Directory (AAD) group you created for Windows Autopilot devices. This ensures that the deployment profile is automatically applied to all devices in the group. Once the group is added, click Next to continue with the configuration.
On the Review + Create page, carefully review all configuration details for your Windows Autopilot Deployment Profile. Once you’ve verified the settings, click the Create button to finalize and publish the profile in Microsoft Intune.

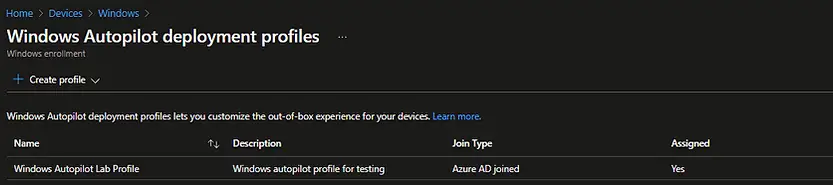
The Windows Autopilot Deployment Profile has now been successfully created. You can view and manage it by navigating to Devices → Windows Enrollment → Windows Autopilot Deployment Profiles in the Microsoft Intune portal.
Configure Enrollment Status Page (ESP)
The Enrollment Status Page (ESP) provides real‑time visibility into the progress of device provisioning during enrollment. It appears when a new device is enrolled in Microsoft Intune or when a new user signs in for the first time.
You can enable ESP during the default Out‑of‑Box Experience (OOBE) for:
- Azure AD Join
- Windows Autopilot deployments
- First‑time sign‑in for new users
By showing ESP, IT admins can ensure that critical apps, policies, and configurations are applied before users access the desktop, delivering a consistent and secure onboarding experience.
For a detailed walkthrough, check out this post for the step‑by‑step guide to configuring the Enrollment Status Page (ESP) in Microsoft Intune. It covers how to enable ESP during Windows Autopilot deployments, Azure AD join, and first‑time user sign‑ins to ensure a smooth and secure provisioning experience.
Manually Register the Device with Windows Autopilot
After configuring all required settings in Microsoft Intune to support Windows Autopilot scenarios, the next step is to manually register a test device. This process is primarily intended for testing and validation.
In production environments, organizations should rely on OEMs (Original Equipment Manufacturers) or Cloud Solution Provider (CSP) partners for Autopilot registration. OEMs such as Dell, HP, and Lenovo support the Windows Autopilot OEM partner program and can handle device registration on your behalf using the registration authorization process.
Check out this article to know different ways to collect hardware hash for a device: Get Hardware Hash for Windows Autopilot
For testing purposes, follow these steps to manually register a device:
- Install Windows 10 on a test device or virtual machine (VM). This device will be used for Autopilot deployment testing.
- Download the PowerShell script
Get-WindowsAutoPilotInfo.ps1from the PowerShell Gallery. This script retrieves the device’s hardware hash and serial number. The serial number helps quickly identify which device the hardware hash belongs to. - Run the PowerShell script on the test device you prepared. The script will generate the hardware hash file required for manual registration in Windows Autopilot.

Once the hardware hash has been captured in a CSV file, the next step is to upload it to Windows Autopilot. Using Microsoft Intune, you can import the device and register it for Autopilot deployment.
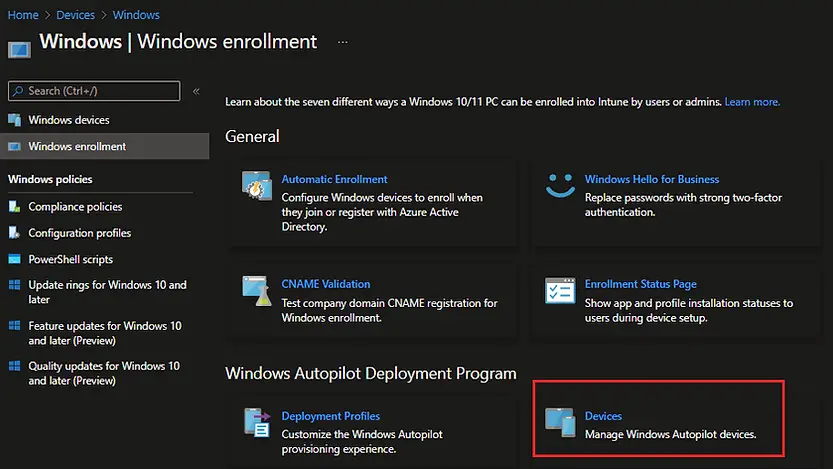
In the Microsoft Endpoint Manager admin center, navigate to: Devices → Windows → Windows Enrollment → Windows Autopilot Deployment Program → Devices
From here, you can upload the CSV file to add the device to Autopilot for testing or production scenarios.
On the next screen, click on Import
On the Add Autopilot Devices screen, click the Browse button and select the hardware hash CSV file you previously generated. Once the file is selected, click Import to upload the device information. This step registers the device into the Windows Autopilot Deployment Program through Microsoft Intune, enabling automated enrollment and configuration during provisioning.

You can monitor the status of device imports in the Notifications area of the Microsoft Endpoint Manager admin center. This allows you to verify whether the hardware hash CSV file was successfully uploaded and if the devices have been registered into the Windows Autopilot Deployment Program.

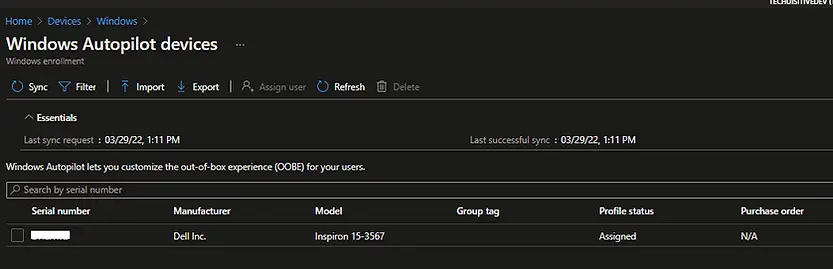
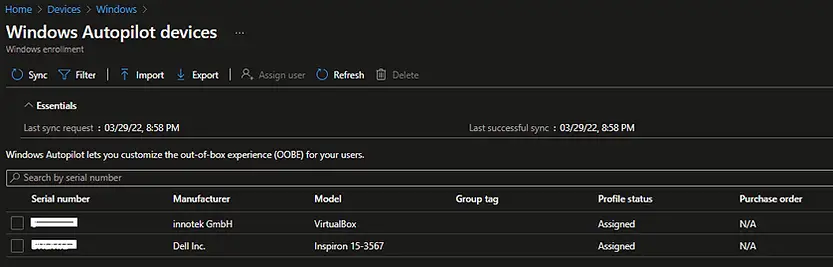
If the import is successful, the device details will appear on the Windows Autopilot Devices page in the Microsoft Endpoint Manager admin center. From here, you can confirm that the hardware hash has been registered, validate the device information, and ensure the correct deployment profile is assigned.
Reset the VM to factory settings
Now that the device has been registered, the next step is to reset the Windows 10 VM to factory settings. This action forces the device to enter the Windows setup Out‑of‑Box Experience (OOBE) stage. At this point, the Windows Autopilot profile is automatically downloaded from the Windows Autopilot service, ensuring the device provisions according to the assigned deployment profile.
⚠️ Important: Before resetting the device, make sure it is connected to a network and that Internet access is available. Without connectivity, the Autopilot profile cannot be retrieved, and the OOBE process will not complete successfully.
Perform the steps below to reset your Windows OS to factory settings.
- From the Start Menu, select Settings
- In the Windows Settings window, select Update & Security
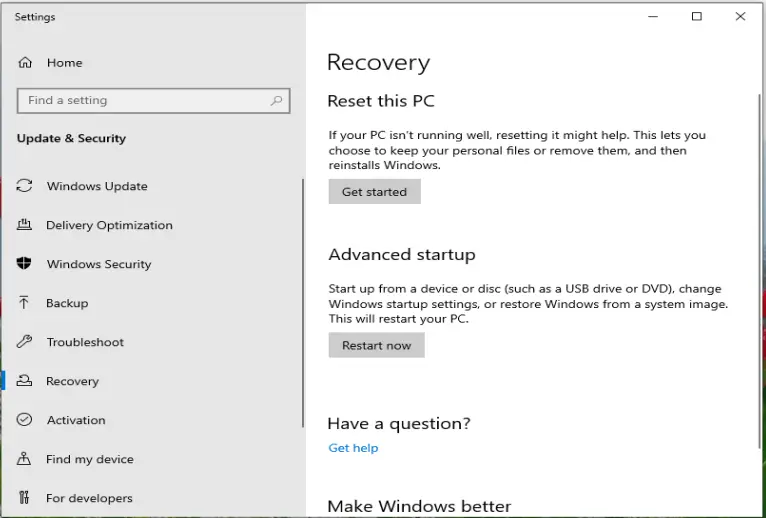
- In the Windows Update window, select Recovery from the left pane
You will now see the Recovery page. Click on Get Started under Reset this PC to begin the reset process.
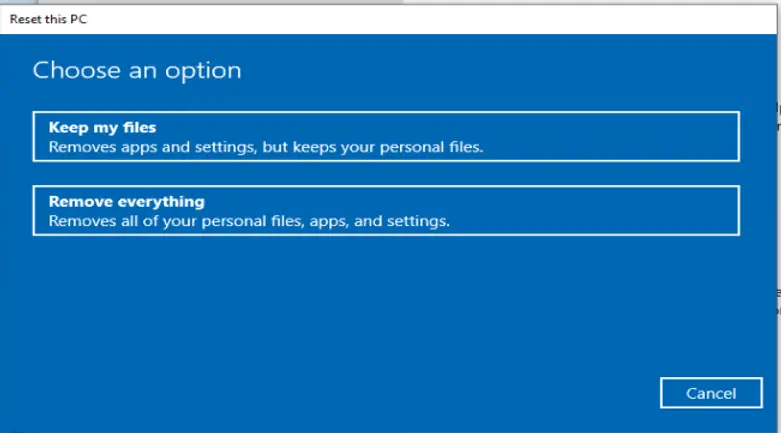
On the Choose an option page, select Remove everything. This ensures the Windows 10 VM is reset to factory settings, wiping all files, apps, and configurations. By doing so, the device will re‑enter the Windows setup Out‑of‑Box Experience (OOBE) stage, where the Windows Autopilot profile is automatically downloaded and applied.
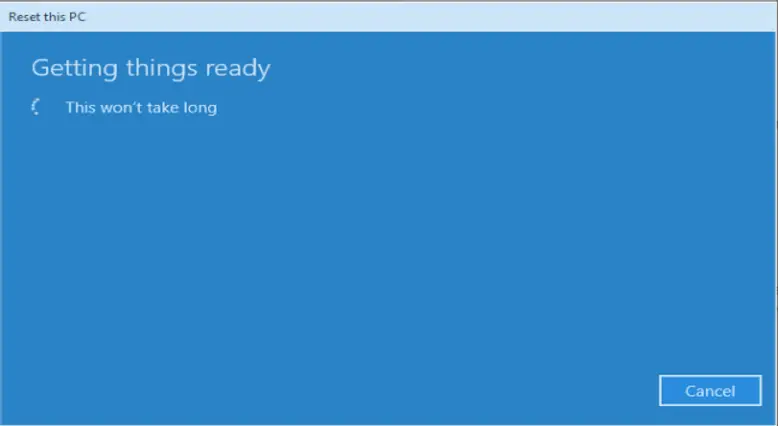
After initiating the reset, you will see the “Getting things ready” page. Once the reset process completes, the machine automatically reboots. Following the reboot, the device enters the Windows setup Out‑of‑Box Experience (OOBE) stage, where the Windows Autopilot profile is downloaded and applied to the device.
Out of Box Experience (OOBE)
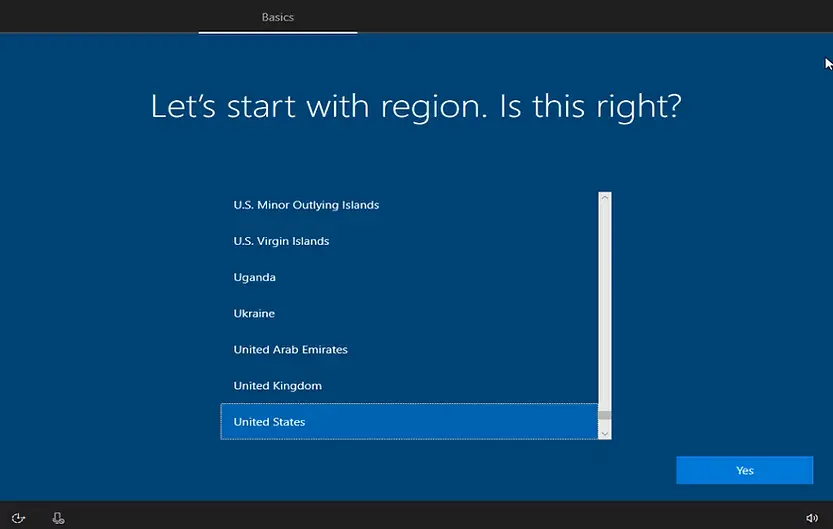
After resetting the test VM, the device automatically enters the Windows setup OOBE stage. The end user will go through the same experience during enrollment. The first few screens include:
- Network connection: When you reset a Windows 10 OS, saved network details such as Wi‑Fi SSID and password are automatically restored. In most cases, this screen may not appear.
- Region settings: Select the appropriate region for the device.
- Keyboard layout: Choose the default keyboard layout.
- Additional keyboard layout: Optionally add extra keyboard layouts if required.
- License agreement: Acknowledge the Microsoft Software License Terms to proceed.
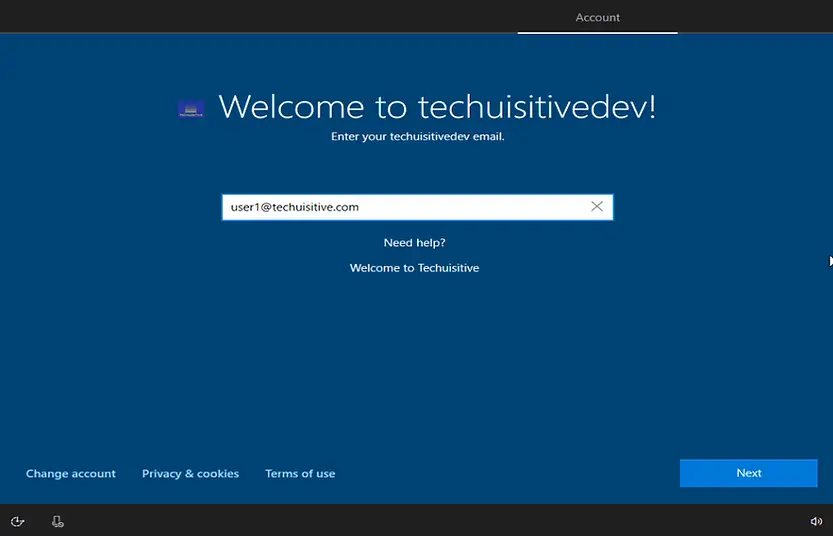
The next screen in the Windows setup Out‑of‑Box Experience (OOBE) is the user login page.
- Company branding & tenant details: If you don’t see your organization’s branding or tenant information here, it means the device has not been identified as a Windows Autopilot device. In that case, the Autopilot profile has not been applied.
- Login credentials: The user should sign in with their corporate ID and password. Enter the company corporate ID, click Next, and proceed with authentication.
This step ensures the device is enrolled into Microsoft Intune under the correct tenant and that the assigned Windows Autopilot deployment profile is applied.
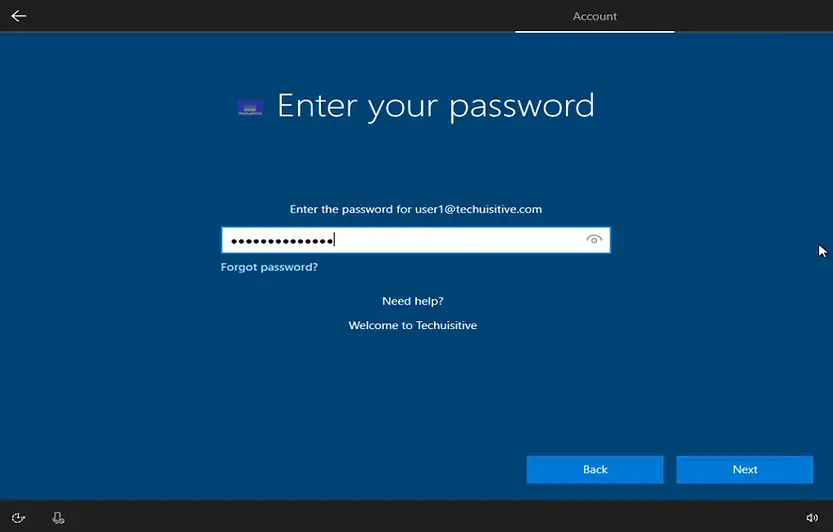
You will be prompted for the password on the next screen. Enter the password and click on Next.
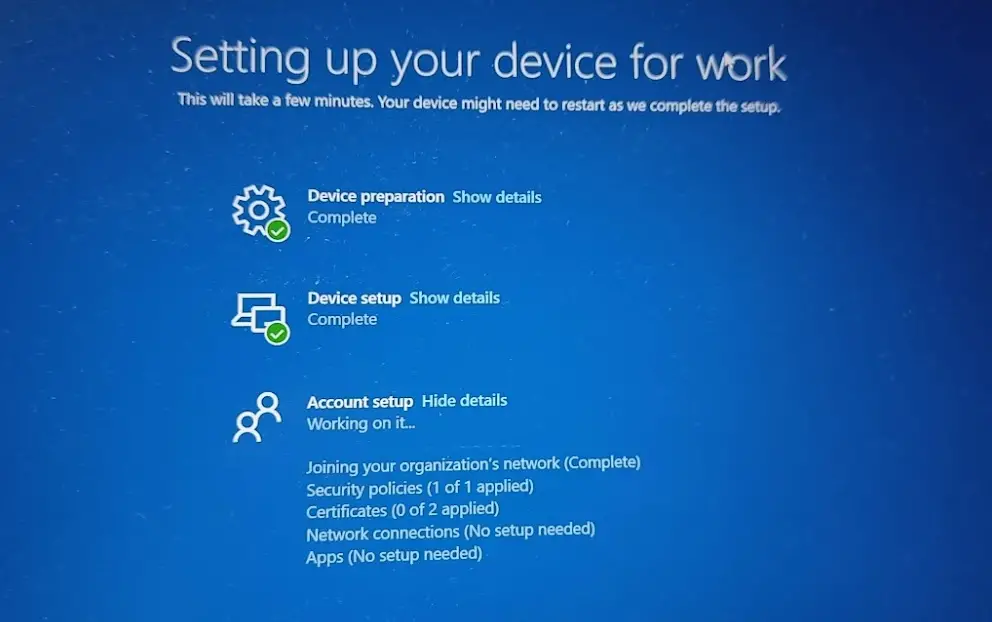
After the user login, the Enrollment Status Page (ESP) will be displayed on the next screen. The ESP provides real‑time visibility into the device provisioning process, showing the progress of app installations, policy configurations, and profile assignments. This ensures that all required settings are applied before the user reaches the Windows desktop, delivering a secure and consistent onboarding experience.
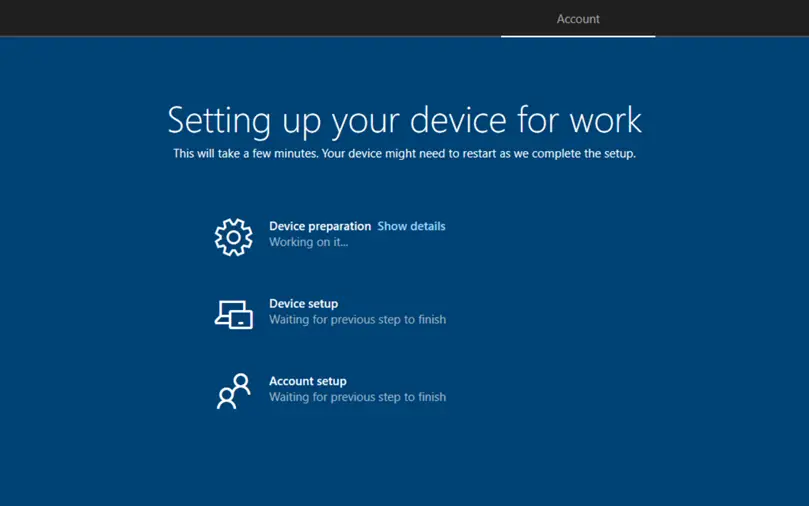
Enrollment Status Page (ESP) Stages
The Enrollment Status Page (ESP) guides users through several stages during device provisioning. These stages ensure that all required configurations, apps, and policies are applied before the user reaches the desktop.
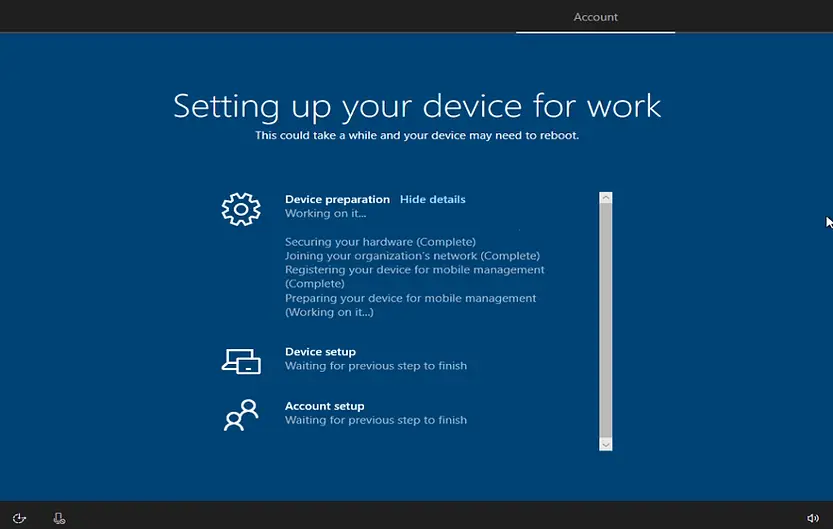
Device Preparation
This stage validates the device setup and prepares it for enrollment. Typical tasks include:
- Securing the device (e.g., TPM validation, BitLocker checks)
- Joining your organization’s network
- Registering your Device for Mobile Device Management
- Preparing your device for mobile management
Once device preparation is complete, the ESP moves to the next stage.
Device Setup:
During the Device Setup phase of the Enrollment Status Page (ESP), Windows Autopilot ensures that all essential configurations are applied before the user can access the system. At this stage, the device receives security policies and installs required apps via Microsoft Intune.
The Device Setup stage includes the following steps:
- Security Policies: Critical compliance and configuration policies are applied to secure the device.
- Certificates: Required certificates are installed to enable secure communication with corporate resources.
- Network Connections: Network profiles are configured to ensure seamless connectivity.
- Apps: Line‑of‑business (LOB) apps, Microsoft 365 apps, and other required software are installed before the user reaches the desktop.
This structured process guarantees that devices are compliant, secure, and ready for productivity from the very first login.

Account Setup:
The Account Setup phase is the final stage of the Enrollment Status Page (ESP). During this stage, the device is joined to Microsoft Entra ID (formerly Azure AD), compliance policies are enforced, and required apps are installed via Microsoft Intune. This ensures the device is fully secured and ready for use before the user reaches the desktop.
The Account Setup stage includes the following actions:
- Joining your organization’s network: The device is connected to the corporate directory via Entra ID/Azure AD.
- Security Policies: Compliance and configuration policies are applied to enforce organizational standards.
- Certificates: Necessary certificates are installed to enable secure access to corporate resources.
- Network Connections: Network profiles are configured to ensure seamless connectivity.
- Apps: Required applications are installed, ensuring the device is ready for productivity from the first login.
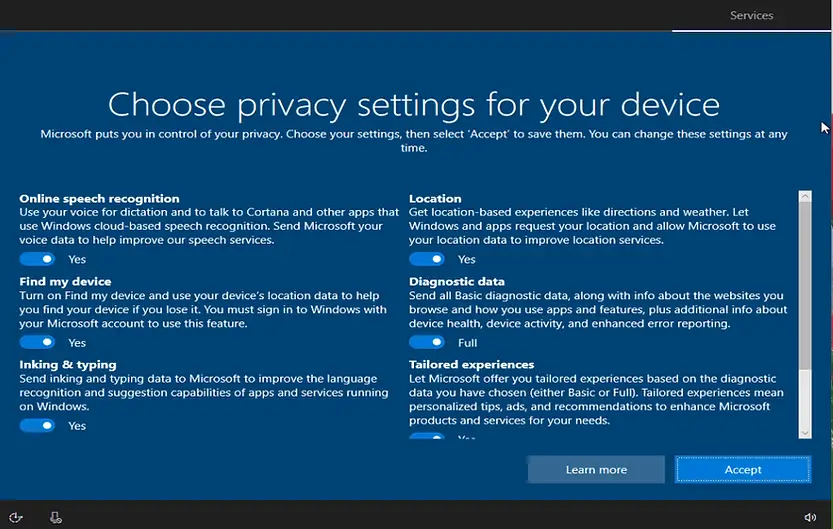
The next screen in the Windows setup OOBE is the Privacy Settings page. Here, you can configure privacy options such as location services, diagnostic data, tailored experiences, and advertising ID.
- Toggle the settings on or off according to your organization’s requirements or personal preferences.
- Once the selections are made, click Accept to continue with the setup process.
This step ensures that privacy configurations are aligned with compliance requirements before the device completes enrollment.
Once enrollment configurations are finished, the user will get a prompt for additional authentication if Multi-Factor Authentication (MFA) is enabled.
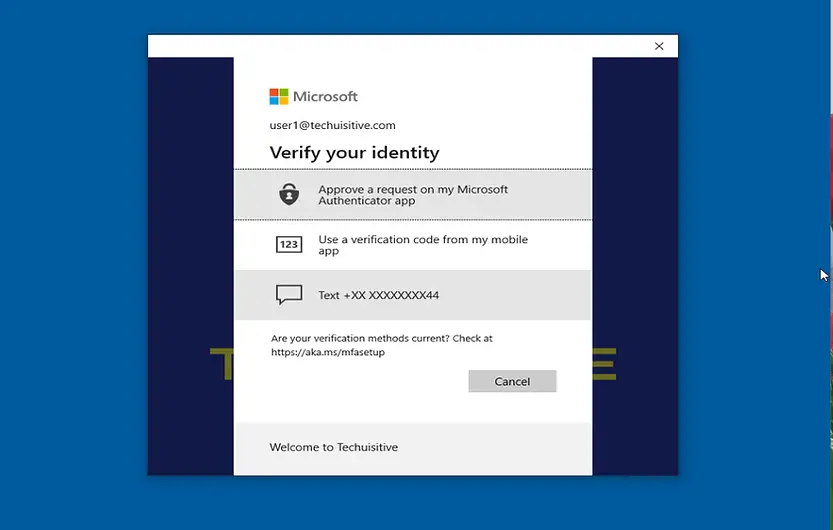
🎉 Enrollment Complete
Your device has completed the Windows Autopilot enrollment process.
- All security policies, certificates, and network configurations have been applied.
- Required apps have been installed via Microsoft Intune.
- The device is now fully joined to your organization’s Microsoft Entra ID (Azure AD) tenant.
- If Multi‑Factor Authentication (MFA) was enabled, the user has already passed the additional verification step.
✅ Your device is now ready to use — secure, compliant, and provisioned with the assigned deployment profile.
Conclusion
By following the complete Windows Autopilot enrollment workflow — from importing devices and resetting them to factory settings, through the Out‑of‑Box Experience (OOBE), the Enrollment Status Page (ESP) stages, privacy configuration, and optional Multi‑Factor Authentication (MFA) — you ensure that every device is provisioned securely, consistently, and in compliance with organizational standards.
This process guarantees that:
- Devices are correctly identified as Autopilot‑managed.
- Security policies, certificates, and network profiles are applied before user access.
- Required apps are installed via Intune.
- Users experience a seamless, branded, and secure onboarding flow.
✅ The end result: A device that is fully ready for productivity from the very first login — secure, compliant, and aligned with your organization’s deployment profile.
Frequently Asked Questions (FAQs)
What is Windows Autopilot?
Windows Autopilot is Microsoft’s modern deployment solution that simplifies provisioning, configuration, and management of Windows 10/11 devices. It integrates with Intune and Microsoft Entra ID (Azure AD) to deliver a zero‑touch setup experience.
Do I need to manually register devices for Autopilot?
Not in production. OEMs (Dell, HP, Lenovo, etc.) or CSP partners can register devices on your behalf. Manual registration using hardware hash is mainly for testing or validation.
What is the Enrollment Status Page (ESP) and why is it important?
ESP provides real‑time visibility during device provisioning. It ensures that required apps, policies, and profiles are installed before users access the desktop, delivering a secure and consistent onboarding experience.
Can I customize the Out‑of‑Box Experience (OOBE) for users?
Yes. Through Autopilot deployment profiles, you can configure options such as Azure AD join, user account type, privacy settings, and company branding to deliver a tailored setup experience.
What happens if ESP installation takes longer than expected?
By default, ESP shows an error after 60 minutes. You can increase this timeout if apps or policies require more time to install during enrollment.
Can users bypass ESP if an installation fails?
Yes, depending on your configuration. You can allow users to:
- Reset the device if installation fails, or
- Bypass ESP and use the device even if errors occur.
How do dynamic groups help in Autopilot deployments?
Dynamic groups in Azure AD automatically include devices based on attributes (like ZTDId). This eliminates manual group management and ensures deployment profiles are applied consistently.
What are the stages of ESP during enrollment?
ESP runs through three stages:
- Device Preparation (TPM validation, BitLocker, MDM registration)
- Device Setup (security policies, certificates, apps)
- Account Setup (Azure AD join, compliance policies, required apps)
What happens if a device is reset to factory settings?
After reset, the device re‑enters OOBE. The Autopilot profile is automatically downloaded, ensuring the device provisions according to the assigned deployment profile.
How does Autopilot improve IT efficiency compared to traditional imaging?
Autopilot eliminates the need for custom images and manual setup. Devices can be shipped directly to users, who simply sign in with corporate credentials to receive all required apps and policies.
Related Posts:
- How to Fix Autopilot error 80070002
- Windows Autopilot Device Preparation – Step-by-Step Guide
- Windows 10 Autopilot Deployment Guide | Intune
- Intune – Configure Enrollment Status Page (ESP)
- Intune – Windows 10 MDM- Basic troubleshooting
- Bulk enrollment of Windows 10/ 11 Device to Intune using Provisioning Package
- Enroll Windows 11 Device to Intune through Azure AD Join method
- Windows 11 enrollment with Provisioning package failed with error code 0x800700b7
- How to Obtain Hardware Hash for Manually Registering Devices with Windows Autopilot
- Dynamic Group Based on Enrollment Profile in Intune.
Subscribe to Techuisitive Newsletter
Be the first to know about our new blog posts. Get our newsletters directly in your inbox and stay up to date about Modern Desktop Management technologies & news.