Managing the local Administrators group on Azure AD joined devices is a critical part of securing enterprise endpoints. By leveraging Microsoft Intune and Endpoint Manager, IT administrators can centrally control who has elevated privileges, reducing the risk of unauthorized access and ensuring compliance with organizational policies. In this guide, we’ll walk through how to manage the local admin group membership using Intune. This approach simplifies Windows device management, strengthens endpoint security, and provides a scalable way to enforce least privilege access across your environment.
Note: Azure AD is now Entra ID.
As of now following local groups can be managed using the Local Users and Groups MDM policy.
- Administrators
- Users
- Guests
- Power Users
- Remote Desktop Users
- Remote Management Users
Step 1: Create an Azure AD Group
We will create an Entra ID (formerly Azure AD) Security Group that will be added to the local Administrators group on Azure AD–joined devices. Using an Azure AD security group simplifies management because you only need to add a user to the group to grant them local admin rights on targeted devices. This approach provides centralized control, reduces manual effort, and ensures consistent enforcement of Intune security policies across your environment.
Create an Azure AD group with the following details.
- Group Type: Security
- Group Name: IT – Helpdesk
- Azure AD roles can be assigned to the group: Select Yes.
- Membership Type: Assigned
- Members: Add the user if you want to add any at this point in time.
Follow the Create Azure AD Group if you need any help in creating the group.
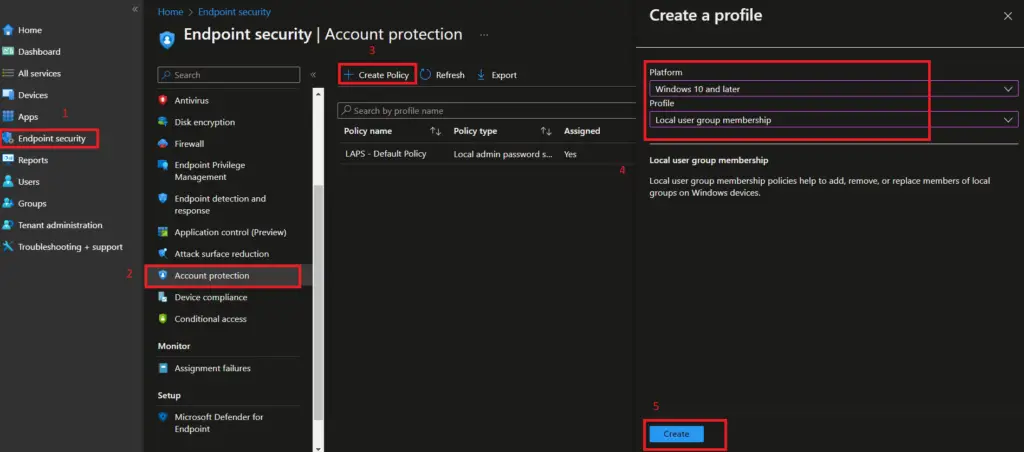
Step 2: Create an Account Protection Policy
The next step is to create an account protection policy. To create a local users group membership policy, you need to log in to the Intune portal https://intune.microsoft.com
- Navigate to Endpoint Security
- Select Account protection
- Click on + Create Policy to start the policy creation process
- From Create a profile, select the following
- Platform: Windows 10 and later
- Profile: Local user group membership
- Click on Create
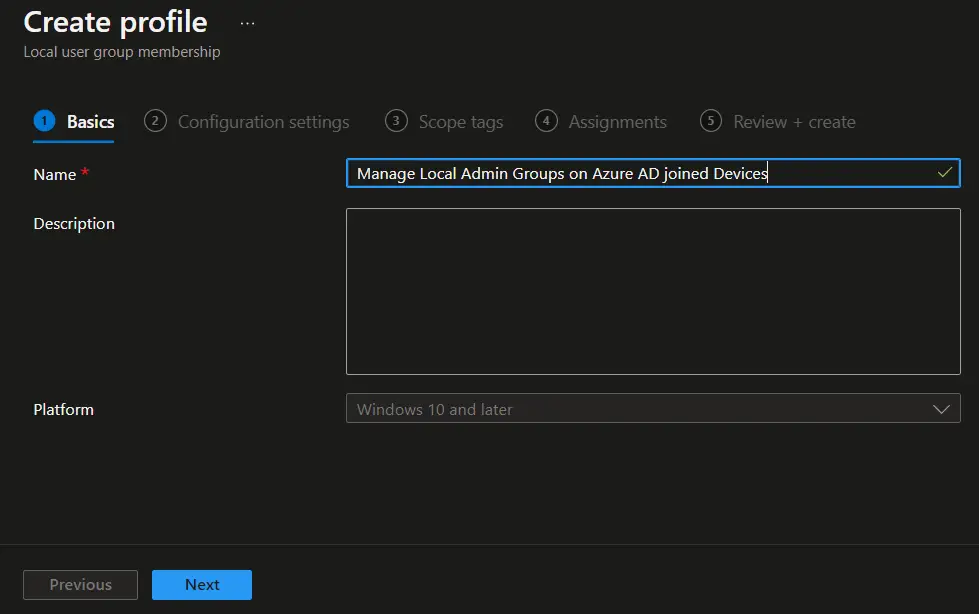
Enter the Name and Description for the profile and click on Next to move to the Configuration Settings page.
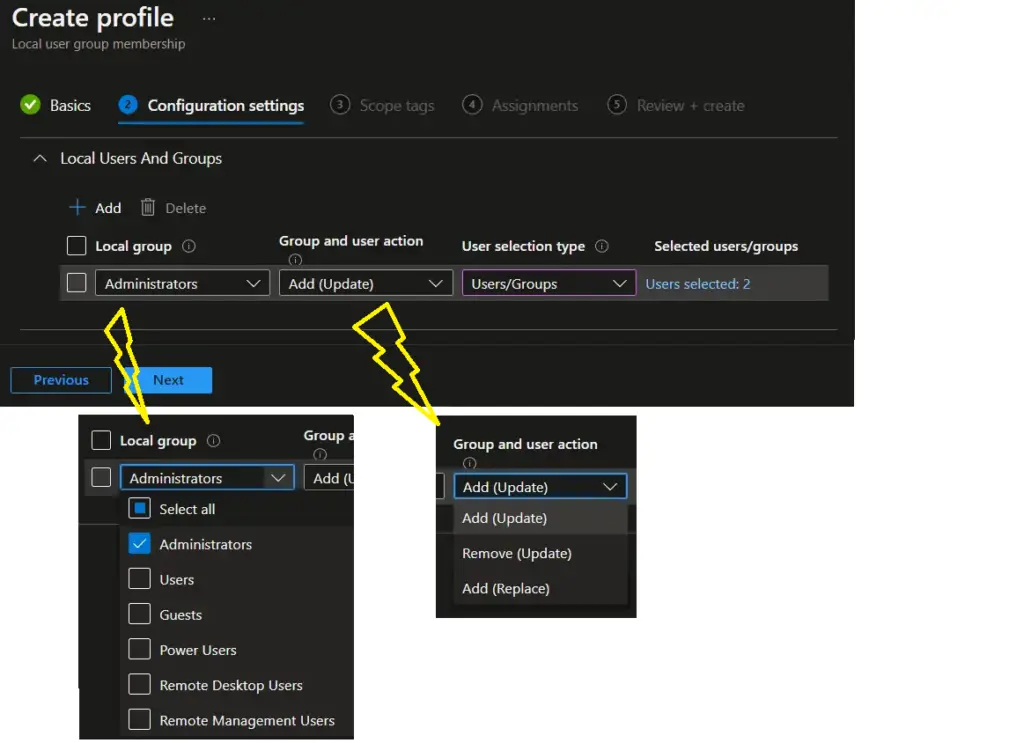
Step 3: Add Configuration Settings for Managing Local Administrator Group Membership
On the Configuration Settings page, select all required settings. The following settings are available and need to be selected.
Local Group:
Select Administrator, as we are adding users / AAD group to the local admin group in this example.
Other local groups that can be managed by Local Users and Group MDM policy are: Users, Guest, Power Users, Remote Desktop Users, and Remote Management Users.
Local Group and user action:
The local group and user management policy have two actions available. They are called Update (U) and Replace / Restrict (R).
- Update Group Membership: Update a group and add/remove members. When using update, existing group members that are not specified in the policy remain untouched.
- Replace Group Membership: Restrict a group by replacing group membership. When using Replace, existing group membership is replaced by the list of members specified in the policy. Any member not specified in the policy is removed.
In Microsoft Intune, you need to select one of the following options.
- Add (Update) : Add members to the specified group. The other member already present in the local group will not be touched.
- Remove (Update): Remove members from the specified group. The other members already in a group and not listed in the policy will remain intact.
- Add (Replace): Replace the existing members of the group with the members provided in the policy.
User Selection Type:
- Users / Groups: Allow you to select Azure AD users / Azure AD groups
- Manual: allows you to add the following
- Username
- Domain\Username
- SID (Security Identifier)
Selected users/groups:
Select Users / Groups or provide details manually based on User Selection Type.
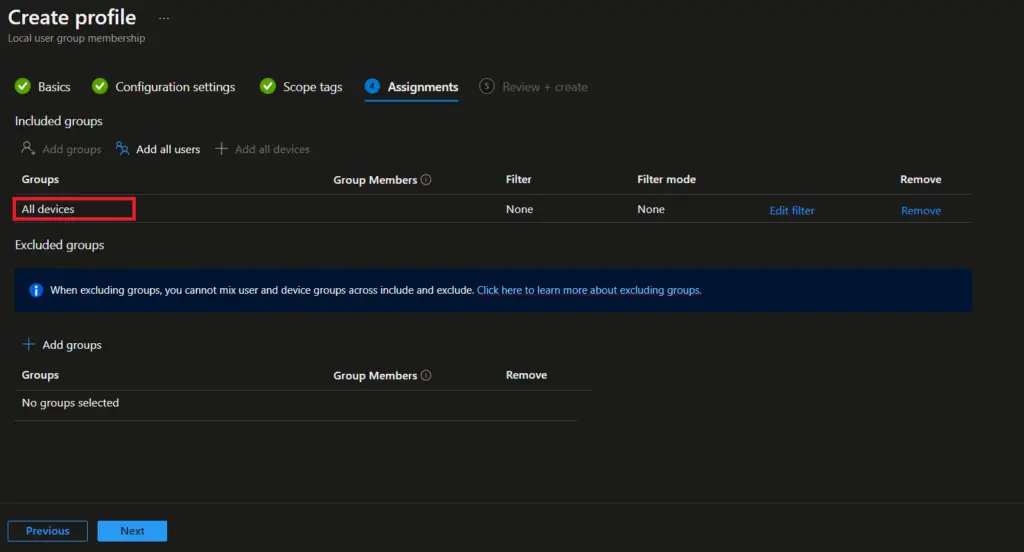
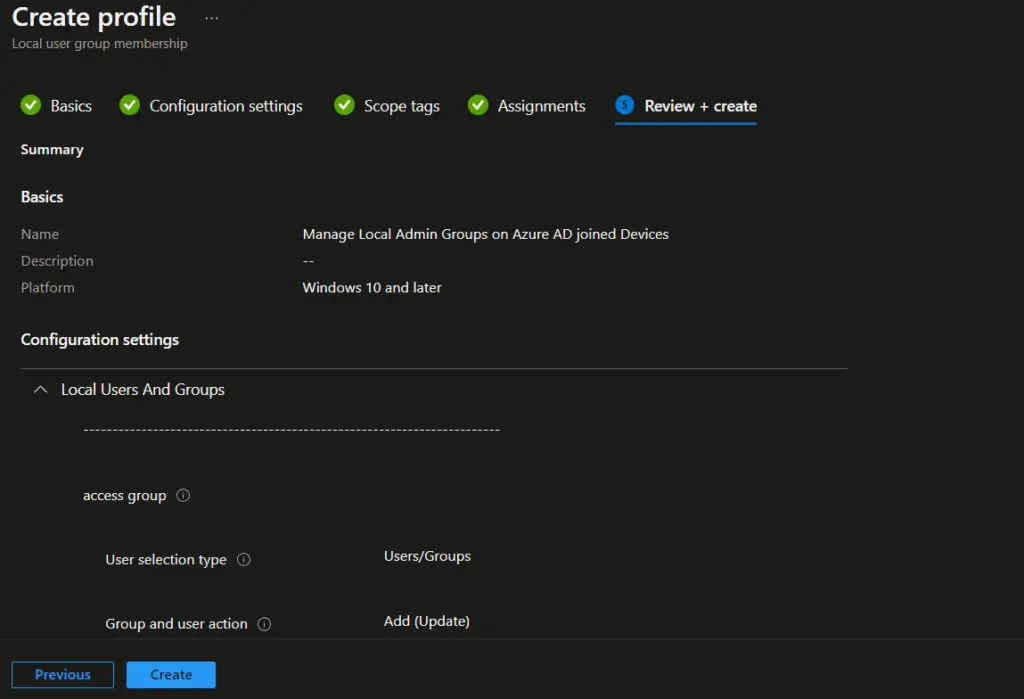
Step 4: Assign & Create Policy
On the Assignment page, you can assign the policy to an Azure AD group, All users, or All devices based on your requirement. Since we are doing this in the test environment, we selected all devices. You can also use Assignment Filters for more granular targeting of policy.
Click on Next.
On the Review + create, review the details and click on the Create button to create the policy.
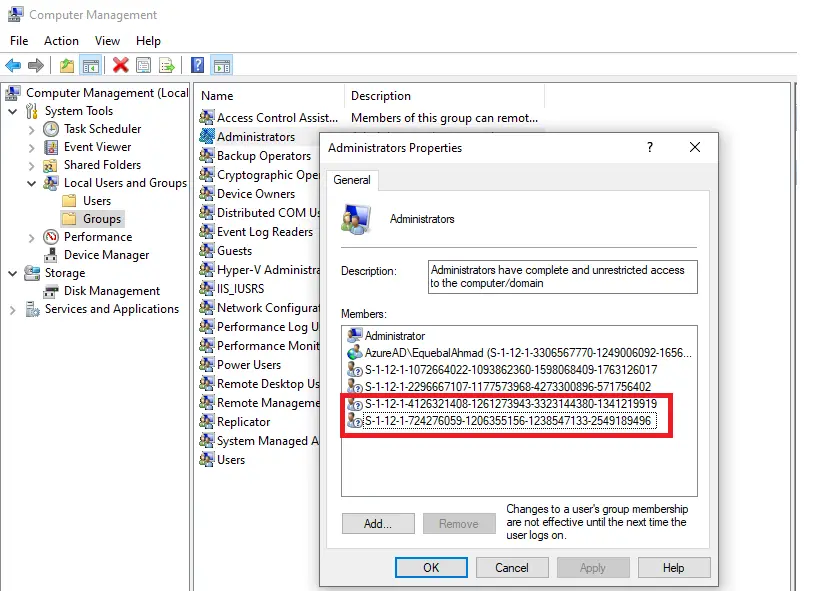
Verify Result on Targeted Device
To verify the results, perform the following steps on one of the targeted Azure AD–joined devices. This will confirm that the Intune Device Configuration Profile has been applied correctly and that the intended local administrator group changes.
- Launch Compmgmt.msc
- Navigate to Local Users and Groups / Groups
- Double-click on Administrator
- Verify if required AAD groups/users are now members of the local Administrator group.
The highlighted SID is for the Azure AD group that we have selected in the Local User and Group policy.
Related Posts
- Block USB Device Access with Exceptions | Microsoft Intune
- Deny Write Access to USB Devices Using Intune Catalog Settings
- Manage Windows Local Administrator Password with Intune & Windows LAPS
- Check OS Version Compliance with Device Compliance Policy & Notify User | Microsoft Intune
- How to manage the local administrators group on Azure AD joined devices | Intune
Subscribe to Techuisitive Newsletter
Be the first to know about our new blog posts. Get our newsletters directly in your inbox and stay up to date about Modern Desktop Management technologies & news.