Microsoft SQL Management Studio (SSMS) 19.0.2 is the latest general availability (GA) version. If you have a preview version of SSMS 19 installed, you should uninstall it before installing SSMS 19.0.2. If you have SSMS 19.x installed, installing SSMS 19.0.2 upgrades it to 19.0.2.
- Release number: 19.0.2
- Build number: 19.0.20209.0
- Release date: March 13, 2023
You can download Microsoft SQL Server Management Studio from https://aka.ms/ssmsfullsetup.
In this blog post, we will look at the steps to install SQL Server Management Studio version 19.0.2 through Microsoft Intune.
Silent Install Command line for SSMS
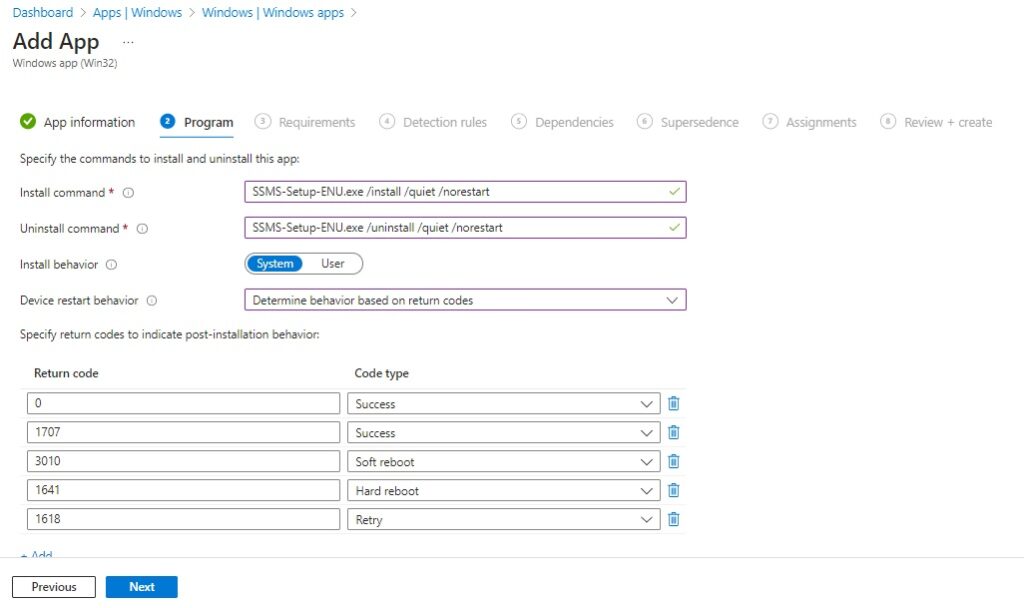
Silent Install: SSMS-Setup-ENU.exe /install /quiet /norestart
Silent Uninstall: SSMS-Setup-ENU.exe /uninstall /quiet /norestart
Prepare SSMS installation source for Intune
Before you deploy an App through Microsoft Intune, the installation source needs to be prepared for Intune. Follow the below article to prepare an installation source for Microsoft Intune Win32 app deployment.
How to Prepare Win32 App Installation source for Microsoft Intune
Create a Win32 App for Microsoft SQL Server Management Studio
Follow the below steps to deploy SQL server management studio via Intune.
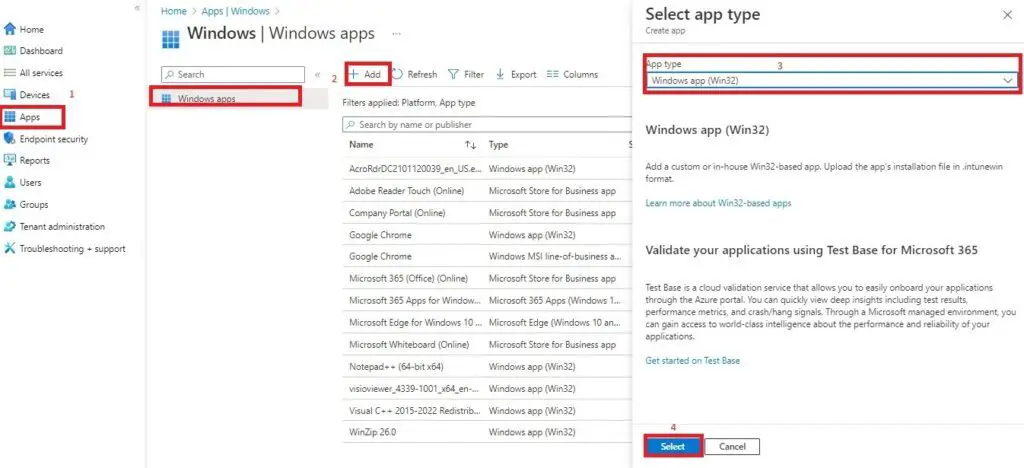
In the Microsoft Intune console, navigate to Apps > Windows Apps, click on Add, select Windows app (win32) App type and click on Select.
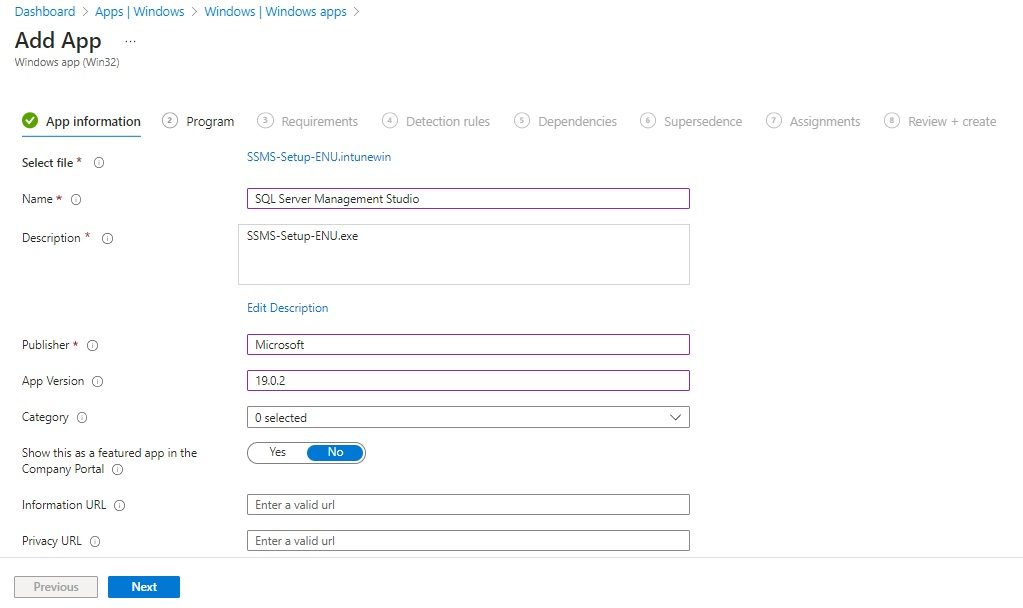
On the Add App page, click on Select app package file , click on Browse button and select the intunewin file which you created in previous step. Click on Ok.

On the App information page, provide the required details and click on Next.
On the Program page, provide the command line for install and uninstall. Select other options as per your requirements and click on Next.
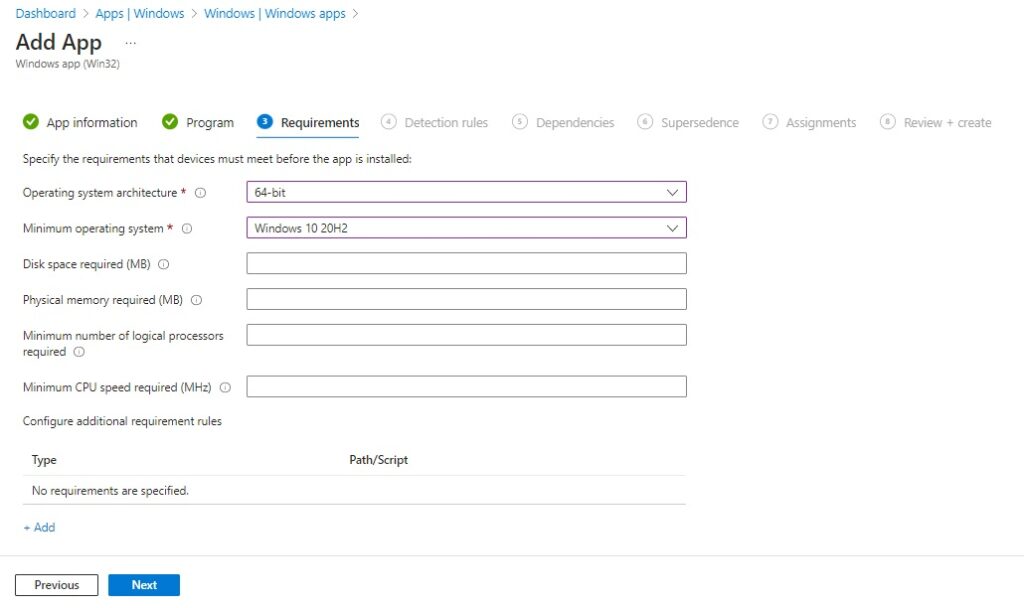
On the Requirements page, select the requirements that must met before installation begins. Click on Next to move to the Detection rules page.
On the Detection rules page, perform the following steps.
- In the Rule format, select Manually configure detection rules
- Click on Add
- in the Detection rule flyer window, select File in Rule type, enter the following details, and click on Next.
Path: C:\Program Files (x86)\Microsoft SQL Server Management Studio 19\Common7\IDE
File: Ssms.exe
Detection Method: File or folder exists
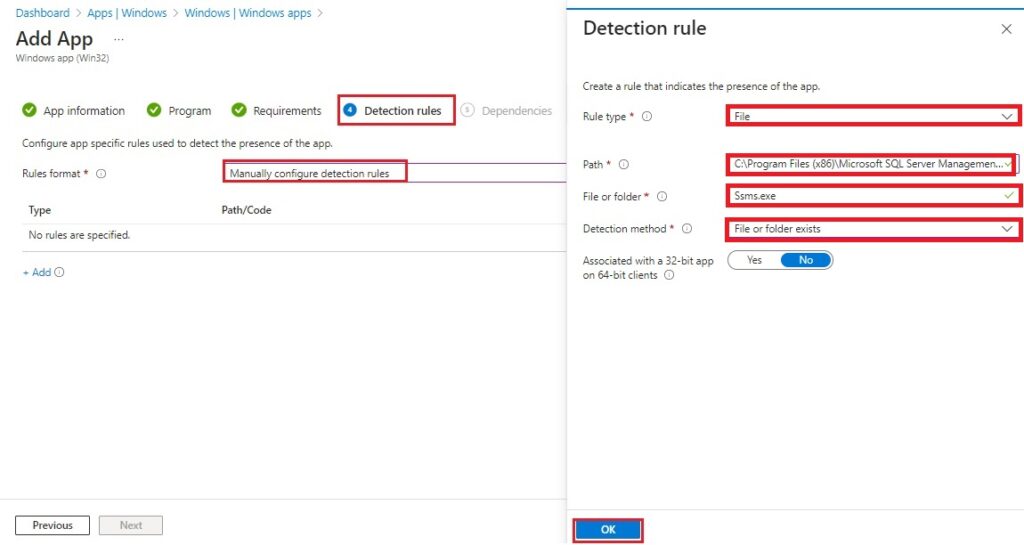
Click on Next thrice to move to the Assignments page. We will not have any Dependencies or Supersedence rules for this installation.
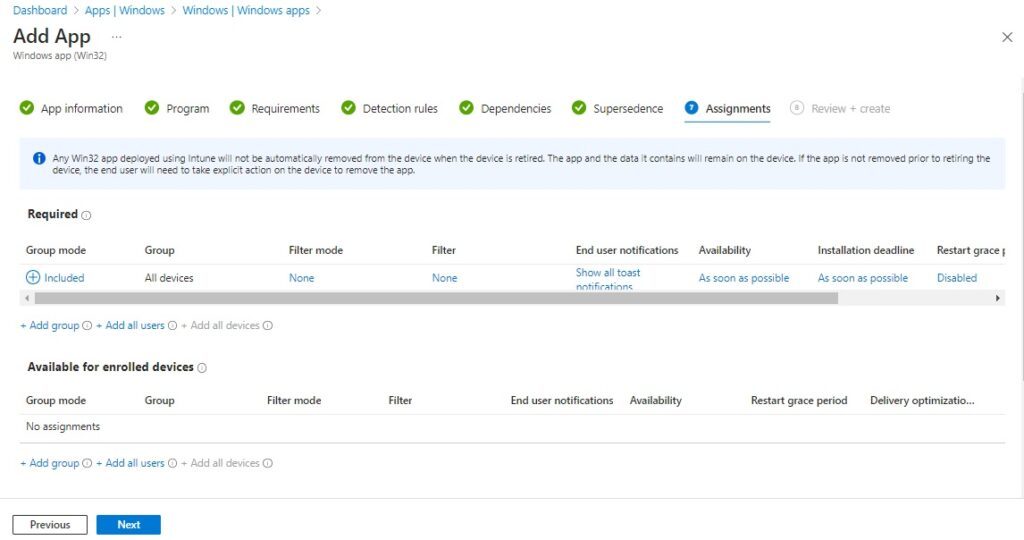
On the Assignments page, assign the App to All Devices, All Users, or an Azure Active Directory (AAD) group as per your requirement. You can also apply Filters for more granular targeting of the App. The application can be assigned as Required or Available. When you select Required, the app will installed automatically. If you select Available, then the app will be available for installation via the Company Portal. User can initiate the installation from the Company Portal.
Click on Next.
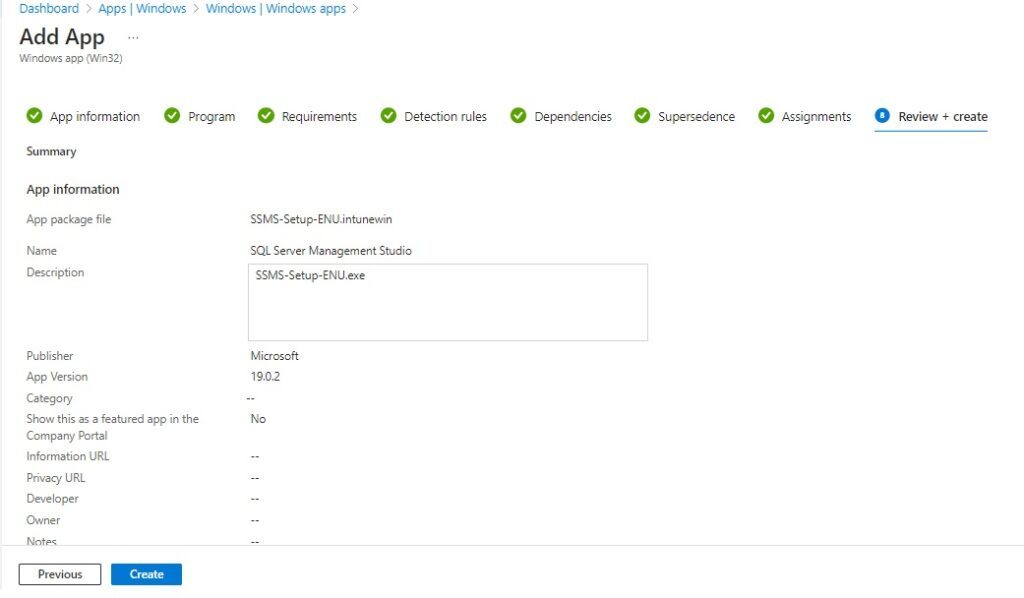
On the Review + create page, review the settings and click on Create.
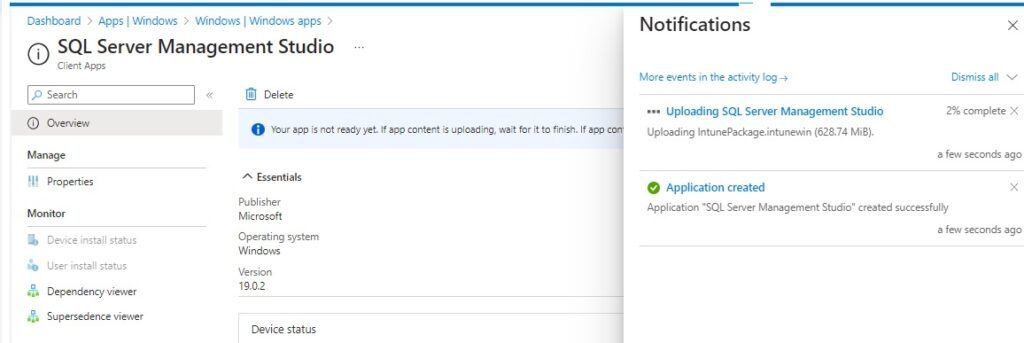
Intune will now create the application and upload .intunewin file to the Intune portal. You can monitor the progress from the Notification area.
Related Posts
- Deploy Win32 App Using Intune Enterprise App Catalog
- Understanding Win32 App Detection Rules
- Understanding Win32 App Requirements Rule
- Upgrade / Replace Win32 Apps with Supersedence Relationship
- Win32 App Deployment with Dependencies
- Win32 Apps vs LOB Apps
- Win32 App Deployment failed with error code 0x80070643
- Win32 App Deployment Failed with Error 0x87D1041C
- Win32 App Deployment failed with error 0x87D300C9
- Win32 App failed with error code 0x80070653
- Deploy Google Chrome for Enterprise with Intune Win32 App
- How to Prepare Win32 App Installation source for Microsoft Intune
- SCCM Device Collection Equivalents in Microsoft Intune for App Deployment
- Deploy Microsoft SQL Server Management Studio 19.02 through Intune
- Organizing Laptop and Desktop in Intune Using Filters
Subscribe to Techuisitive Newsletter
Be the first to know about our new blog posts. Get our newsletters directly in your inbox and stay up to date about Modern Desktop Management technologies & news.