Google Chrome remains one of the most widely used browsers in enterprise environments, and ensuring a consistent, secure deployment across managed devices is a key responsibility for IT admins. While SCCM traditionally handled browser deployments through packages and collections, Microsoft Intune offers a modern, cloud‑based approach using Win32 app deployment.
In this guide, we’ll walk through how to package and deploy Google Chrome for Enterprise with Intune, including preparing the installer, configuring detection rules, setting requirement conditions, and applying assignment filters. By the end, you’ll have a repeatable process that ensures Chrome is deployed efficiently and securely across your Windows endpoints.
Prerequisites for Win32 App Deployment in Intune
Before deploying Win32 applications with Intune, ensure the following requirements are met:
- Operating System: Windows 10 version 1607 or later (Enterprise, Pro, or Education editions).
- Device Enrollment: Devices must be enrolled in Intune and be one of the following:
- Azure AD registered
- Azure AD joined
- Hybrid Azure AD joined
- Application Size: The packaged Win32 app must not exceed 8 GB per application.
How to Download Google Chrome Enterprise
You can download the latest version of Google Chrome for Enterprise directly from Google’s official site:
👉 Download Google Chrome Enterprise
This package is specifically designed for enterprise environments, offering IT admins the ability to deploy Chrome with centralized policies, enhanced security, and streamlined updates.
Prepare Win32 App content for Intune
The Intune Win32 Content Prep Tool allows you to create a single, compressed package that can be uploaded and deployed through Microsoft Intune. This step is essential for deploying applications like Google Chrome for Enterprise using the Win32 app model.
Steps to Prepare the Content
- Download and install the IntuneWinAppUtil tool (Intune Content Prep Tool).
- Prepare the installation source files for Google Chrome (e.g., MSI or EXE installer, along with any required scripts).
- Run the Content Prep Tool to convert the source files into a
.intunewinpackage. - Upload the package to Intune via the Endpoint Manager admin center.
For a detailed walkthrough, follow our guide: 👉 How to prepare app installation source for Intune
Create a Win32 Application for Google Chrome Enterprise Deployment
Once you have prepared the .intunewin package using the Intune Content Prep Tool, follow these steps to create the Win32 application in Intune:
Add a New Win32 App in Intune
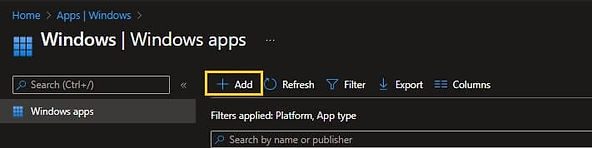
Log in to the Microsoft Intune Admin Center. Navigate to: Apps > Windows > Windows apps.
Click on +Add to Add a New App
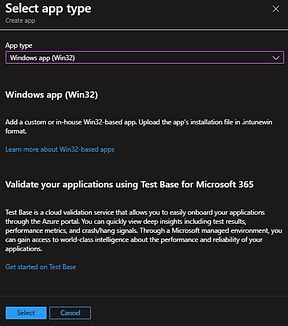
On the flyout window that appears on the right side of the screen:
- From the App type drop‑down list, select Windows app (Win32).
- Click Select to confirm your choice.
This sets the stage for uploading the .intunewin package you prepared earlier and configuring the deployment details for Google Chrome Enterprise.
Upload the App Package File
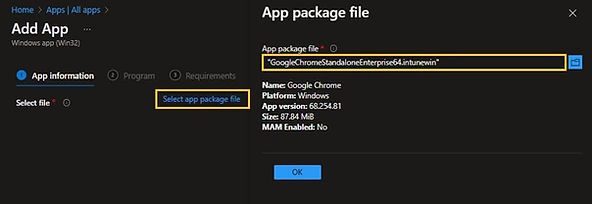
On the App Information page:
- Click Select app package file.
- In the dialog box, click Browse and locate the Google Chrome Enterprise MSI file you downloaded earlier.
- Select the file and click OK to proceed.
This will attach the Chrome installer to your Win32 app configuration, allowing you to continue with program details, requirements, and detection rules.
Fill in App Information
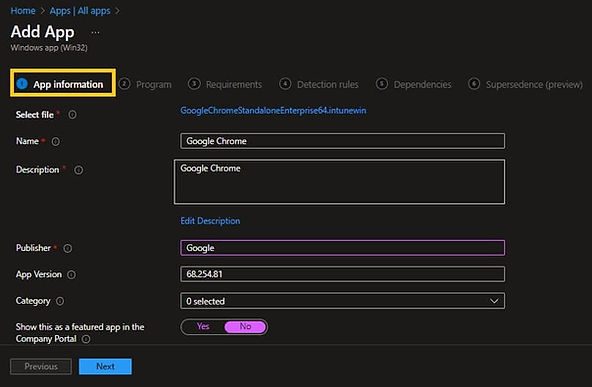
On the App Information page:
Once all details are filled in, click Next to move to the Program page.
Provide the required details for the application:
Name: e.g., Google Chrome Enterprise
Description: A short summary of the app and its purpose.
Publisher: e.g., Google LLC
Version: Enter the version of the MSI installer you are deploying.
(Optional) Add Category, Logo, or other metadata for easier identification in the Intune portal.
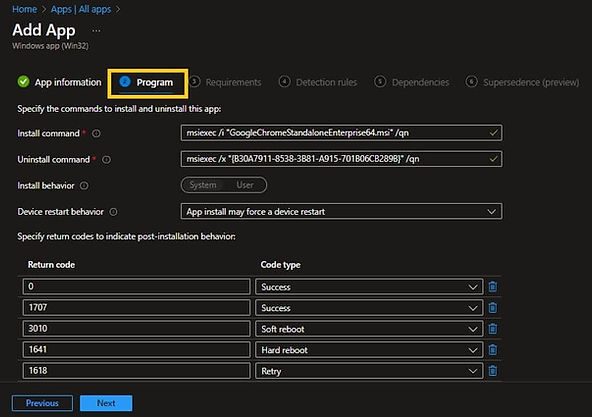
Configure Program Details
On the Program page:
- You’ll notice that the Install and Uninstall command lines are automatically populated from the MSI package.
- You can modify these commands as needed to suit your deployment requirements. For example:
- Enable verbose logging by adding logging parameters to the install command.
- Run installation via a batch file or PowerShell script if you need additional pre‑ or post‑install logic.
Once you’ve reviewed or updated the commands, click Next to proceed to the Requirements page.
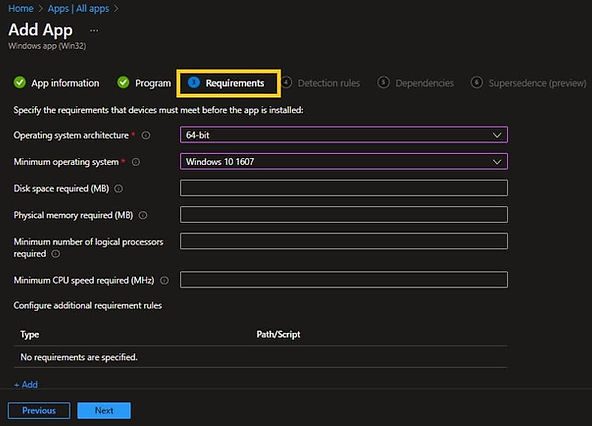
Configure Requirements
On the Requirements page, you must configure at least the mandatory rules. Win32 app requirements define the conditions that must be met for the application to install. If the requirements are not satisfied, the app will not be deployed to the device.
For Google Chrome Enterprise deployment, we’ve configured the following mandatory requirements:
- Operating System architecture: 64‑bit
- Minimum Operating System: Windows 10, version 1607
Once these requirements are set, click Next to proceed to the Detection Rules page.
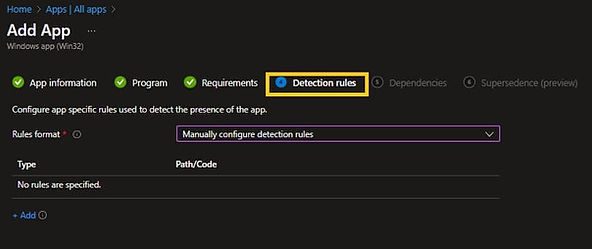
Configure Detection Rules
On the Detection Rules page, you must configure at least one detection rule.
Detection rules in Intune are used to determine whether a Win32 app is already present on a device. They ensure that:
- The app installation only starts if the application is not already installed.
- The same rules are used to confirm successful installation after deployment.
For a deeper dive into detection logic, see our detailed guide: Understanding Intune Win32 App Detection Rules.
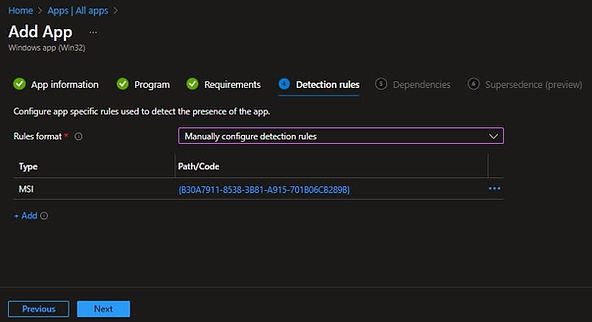
To add a Detection rule, select “Manually configure detection rules” in Rule format and click on Add.
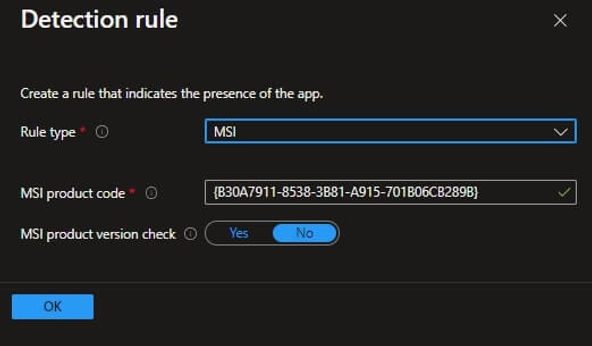
On the Detection Rules flyout window, select MSI in the Rule type drop‑down; in most cases, the MSI product code will populate automatically from the uploaded package, but if it does not, you must manually provide the correct MSI product code to ensure Intune can properly detect the presence of Google Chrome Enterprise and validate the installation before proceeding to the Dependencies page.
Click on Ok to close the window.
On the Detection Rules page, once you’ve configured the MSI detection rule, simply click Next to continue to the Dependencies page, where you can define any prerequisite applications that must be installed before Google Chrome Enterprise is deployed.
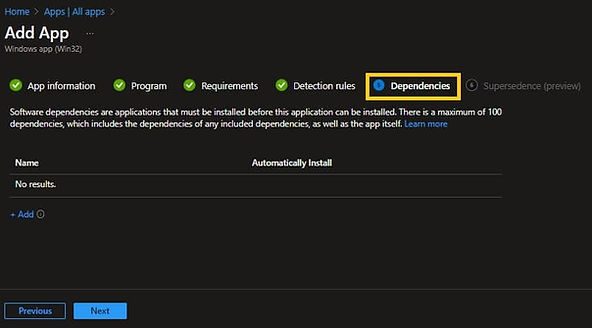
Configure App Dependencies
App dependencies are applications that must be installed before your Win32 app can be deployed. This feature allows you to chain applications and their dependencies so they install in sequence, ensuring prerequisite software is in place before the main app runs. While this setting can be useful for complex deployments, it is optional and not required for Google Chrome Enterprise. If you’d like to explore this topic further, you can follow our detailed post on Win32 App Dependencies for best practices and advanced scenarios.
Click on Next to move to the Supersedence page.
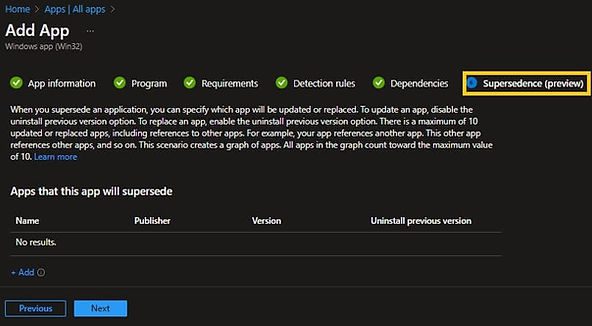
Configure Supersendence
In Microsoft Intune, Supersedence is an optional feature that allows you to update or replace existing Win32 applications with newer versions of the same app or even with a completely different Win32 app. This functionality helps streamline application lifecycle management by automatically removing or upgrading older versions when a new package is deployed. Since it is not required for Google Chrome Enterprise deployment, we will skip this step.
If you’d like to explore the concept further, you can follow our detailed post on the Supersedence relationship in Intune Win32 apps for advanced scenarios and best practices.
Click on Next to go to the Assignment page.
Assign App
On the Assignment page, click on Add Group under Required to add the Azure AD Group to which you want to assign this application.
Select the AAD group from the Flyer Window and click on Select to return to the Assignment page.
You can also use the Assignment Filters to further narrow down the scope of deployment. Check out below articles if you want to learn more about Intune assignment filters.
Intune Filters – Assign Microsoft Store App policy using Filters
| Note: In Intune, Required deployments enforce installation of the application on the selected devices or groups automatically, ensuring the app is pushed without user intervention. By contrast, Available deployments make the application optional, allowing users to install it themselves from the Company Portal when needed. This distinction helps admins choose between mandatory rollout and self‑service availability depending on organizational requirements. |
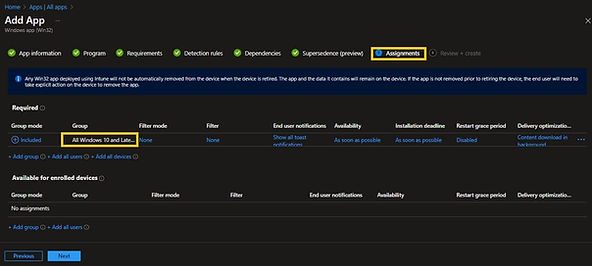
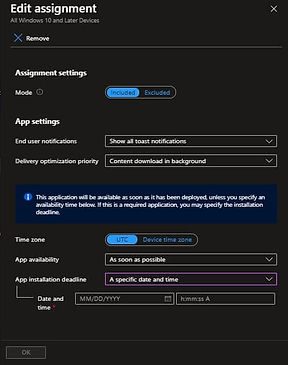
On the Assignment page, you can configure the following additional deployment settings:
- End User notifications – control whether users see prompts or messages during installation.
- Delivery optimization priority – manage bandwidth usage and prioritize app delivery.
- App availability – specify when the app becomes available in the Company Portal.
- App installation deadline – enforce a required installation by a certain date.
These options give admins more flexibility to balance user experience with organizational requirements before moving on to the Review + Create step.
Click on Next on the Assignment page to move to the Review + create page.
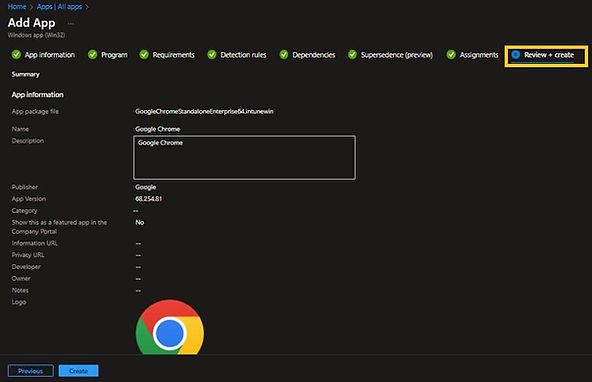
Review and Create Application
On the Review + Create page, carefully review all the configuration settings you’ve entered for the Win32 app deployment—such as app information, program details, requirements, detection rules, dependencies, supersedence, and assignments. Once you’ve confirmed everything is correct, click Create to finalize and publish the application deployment in Intune.
You can monitor the progress from the Notification area.
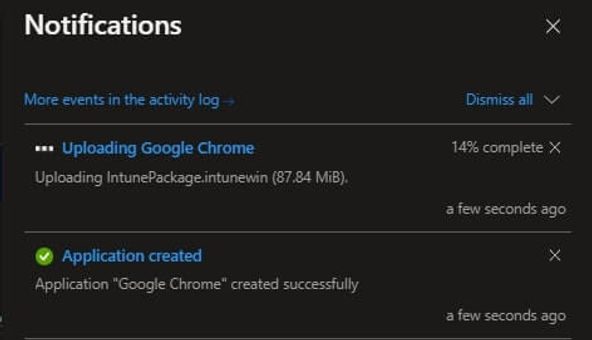
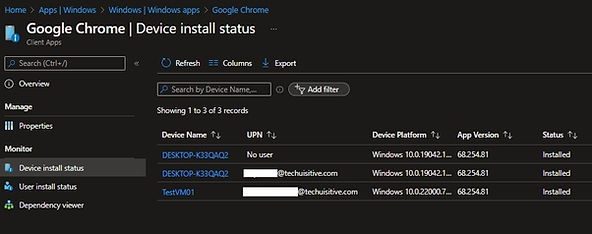
The Google Chrome application has now been successfully created in Intune, and you can monitor its assignment status by navigating to Apps > Windows > \<App Name\>.
From there, you’ll be able to track deployment progress, confirm which devices or groups have received the app, and review any installation success or error reports. This view provides admins with a centralized way to validate that the deployment is working as expected.
Conclusion
Deploying Google Chrome for Enterprise with Intune Win32 apps gives IT admins a modern, flexible way to manage browser installations across Windows devices. By combining packaging, detection rules, requirement conditions, and assignment filters, you can ensure Chrome is deployed consistently, securely, and only where it’s needed.
This approach not only streamlines app deployment but also aligns with best practices for cloud‑based endpoint management. As organizations continue to move away from SCCM toward Intune, mastering Win32 app deployment is a critical skill for every admin.
👉 Stay tuned for more Intune deployment guides, troubleshooting tips, and real‑world scenarios. Subscribe to our blog or follow us for updates on modern management, SCCM to Intune migration strategies, and enterprise app deployment best practices.
Related blog posts
- Deploy Win32 App Using Intune Enterprise App Catalog
- Understanding Win32 App Detection Rules
- Understanding Win32 App Requirements Rule
- Upgrade / Replace Win32 Apps with Supersedence Relationship
- Win32 App Deployment with Dependencies
- Win32 Apps vs LOB Apps
- Win32 App Deployment failed with error code 0x80070643
- Win32 App Deployment Failed with Error 0x87D1041C
- Win32 App Deployment failed with error 0x87D300C9
- Win32 App failed with error code 0x80070653
- Deploy Google Chrome for Enterprise with Intune Win32 App
- How to Prepare Win32 App Installation source for Microsoft Intune
- SCCM Device Collection Equivalents in Microsoft Intune for App Deployment
- Deploy Microsoft SQL Server Management Studio 19.02 through Intune
- Organizing Laptop and Desktop in Intune Using Filters
Subscribe to Techuisitive Newsletter
Be the first to know about our new blog posts. Get our newsletters directly in your inbox and stay up to date about Modern Desktop Management technologies & news.